CLOUD CONNECTOR
If Customer already using workspace based on (Azure, Oracle, GCP or AWS) Cloud accounts and if they want to switch to MSP Hub, here Customer will get option to add their existing Cloud account and they can avail uninterpretable service.
How to add Cloud Connector?
Tip
Click on - Settings → Cloud Management → Cloud Connector → Add New Connector
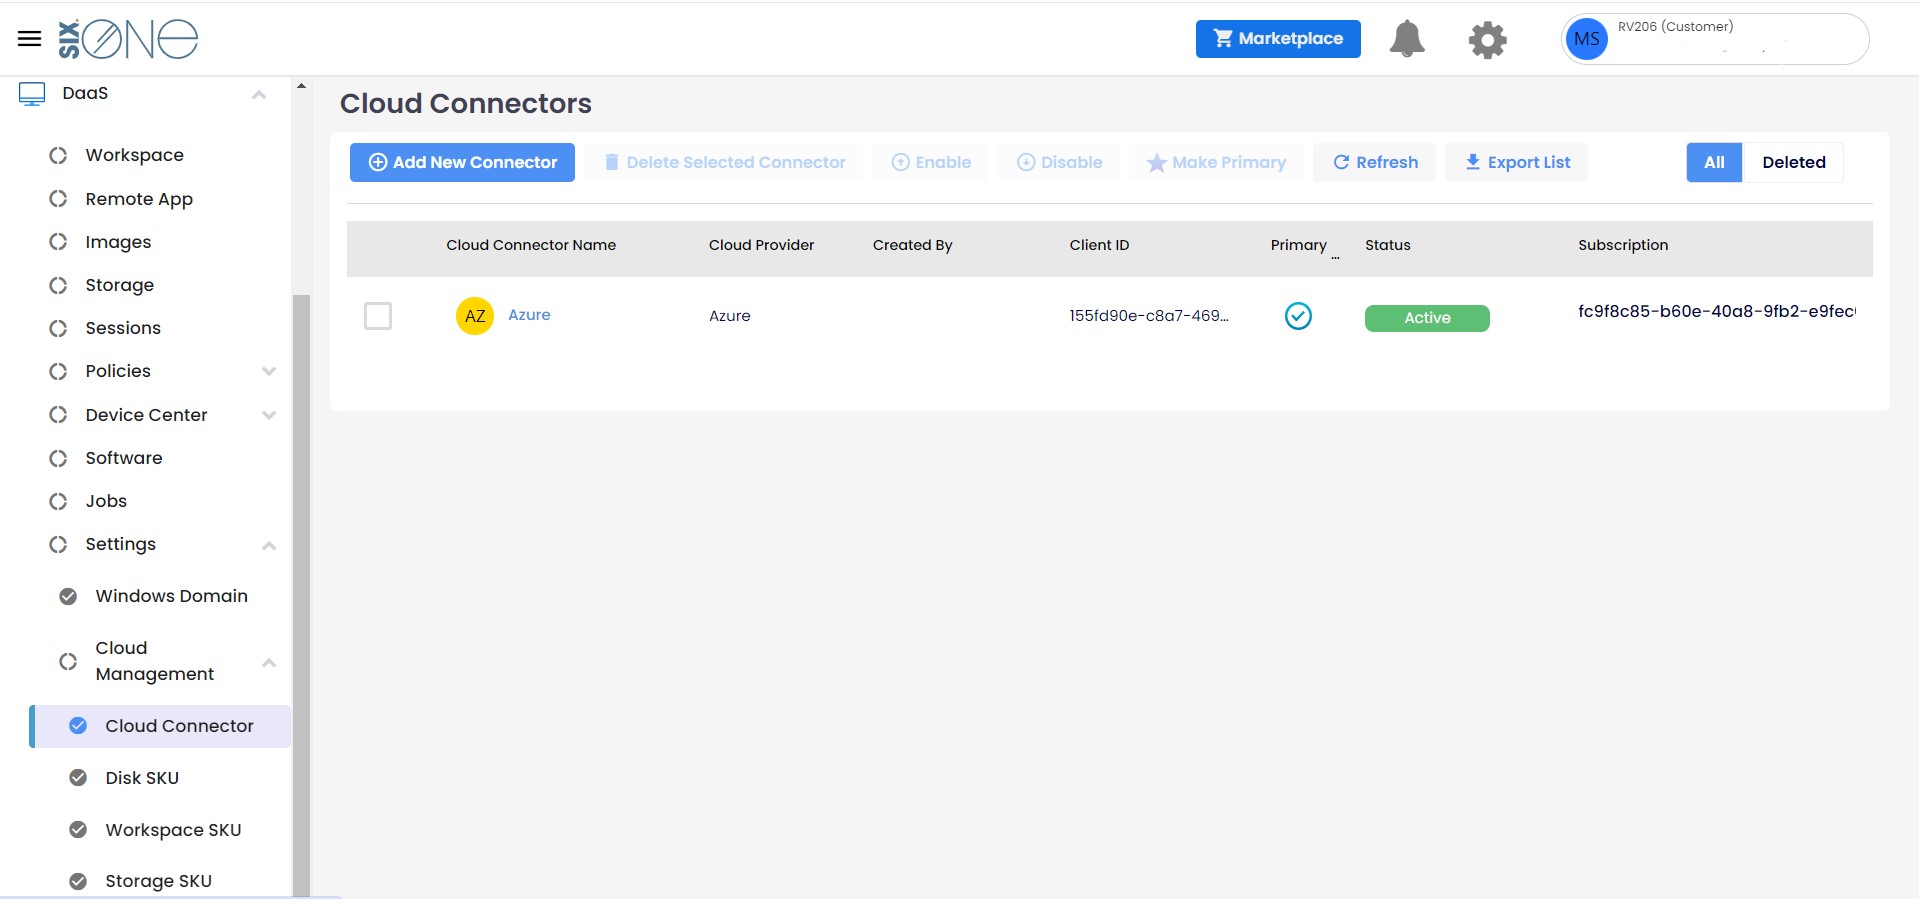
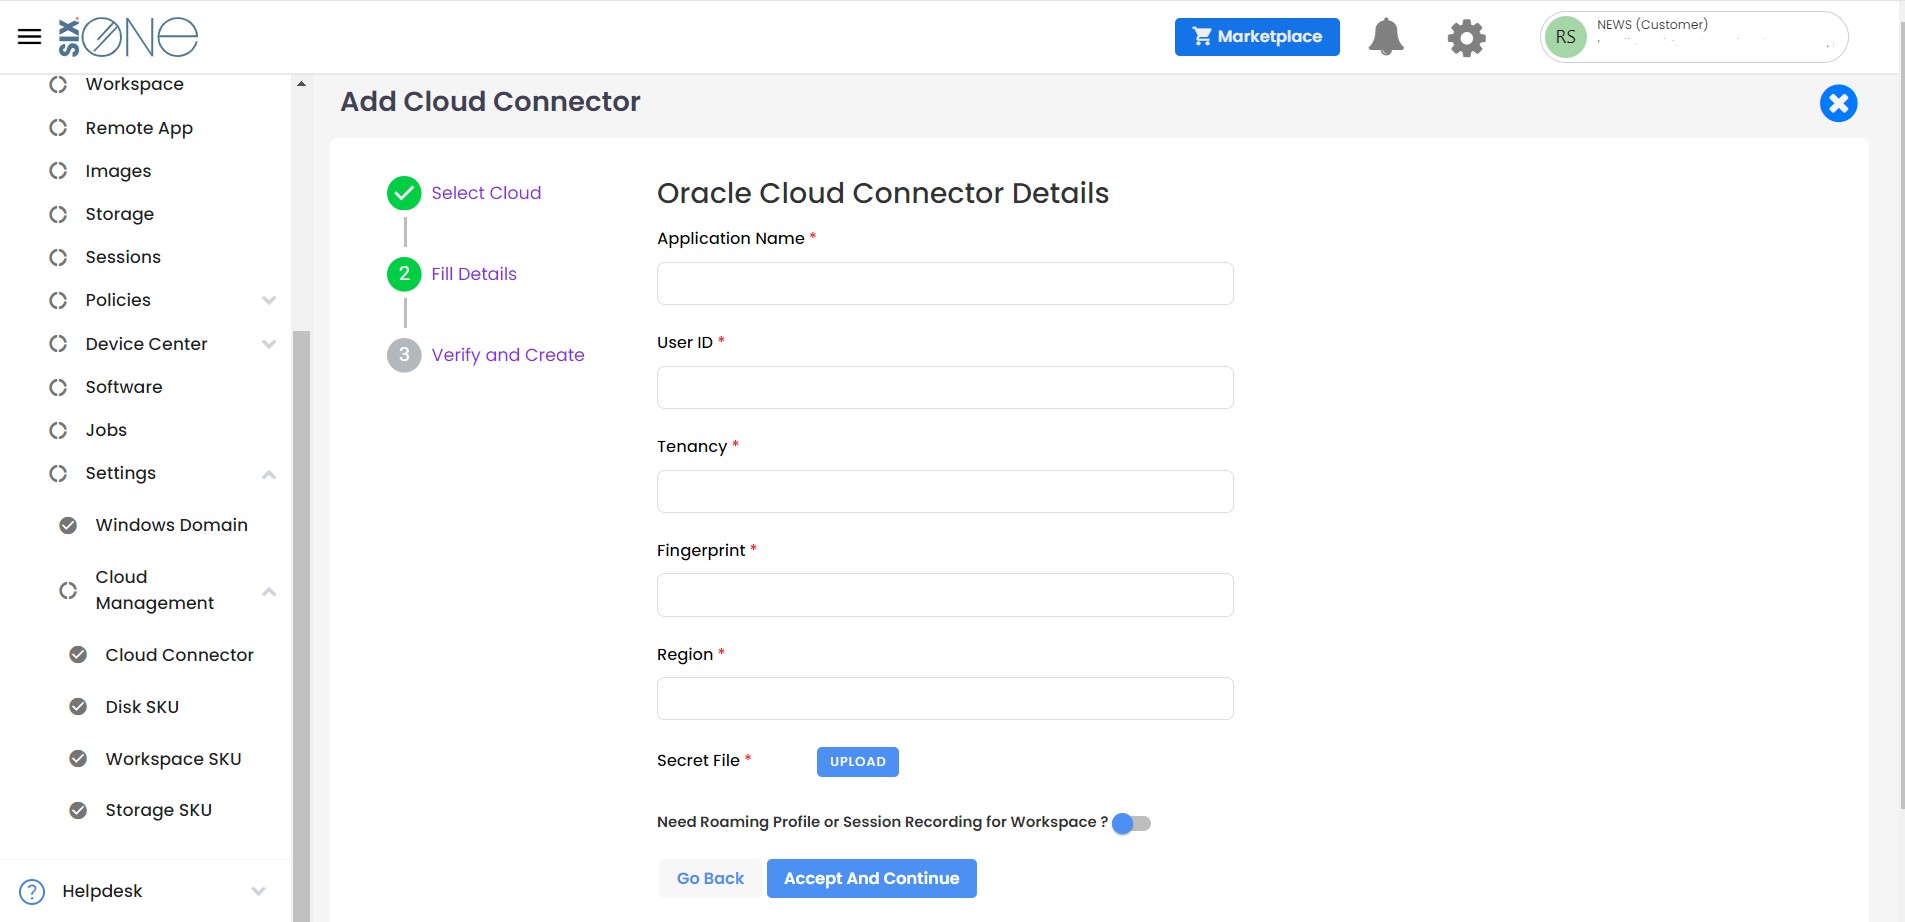
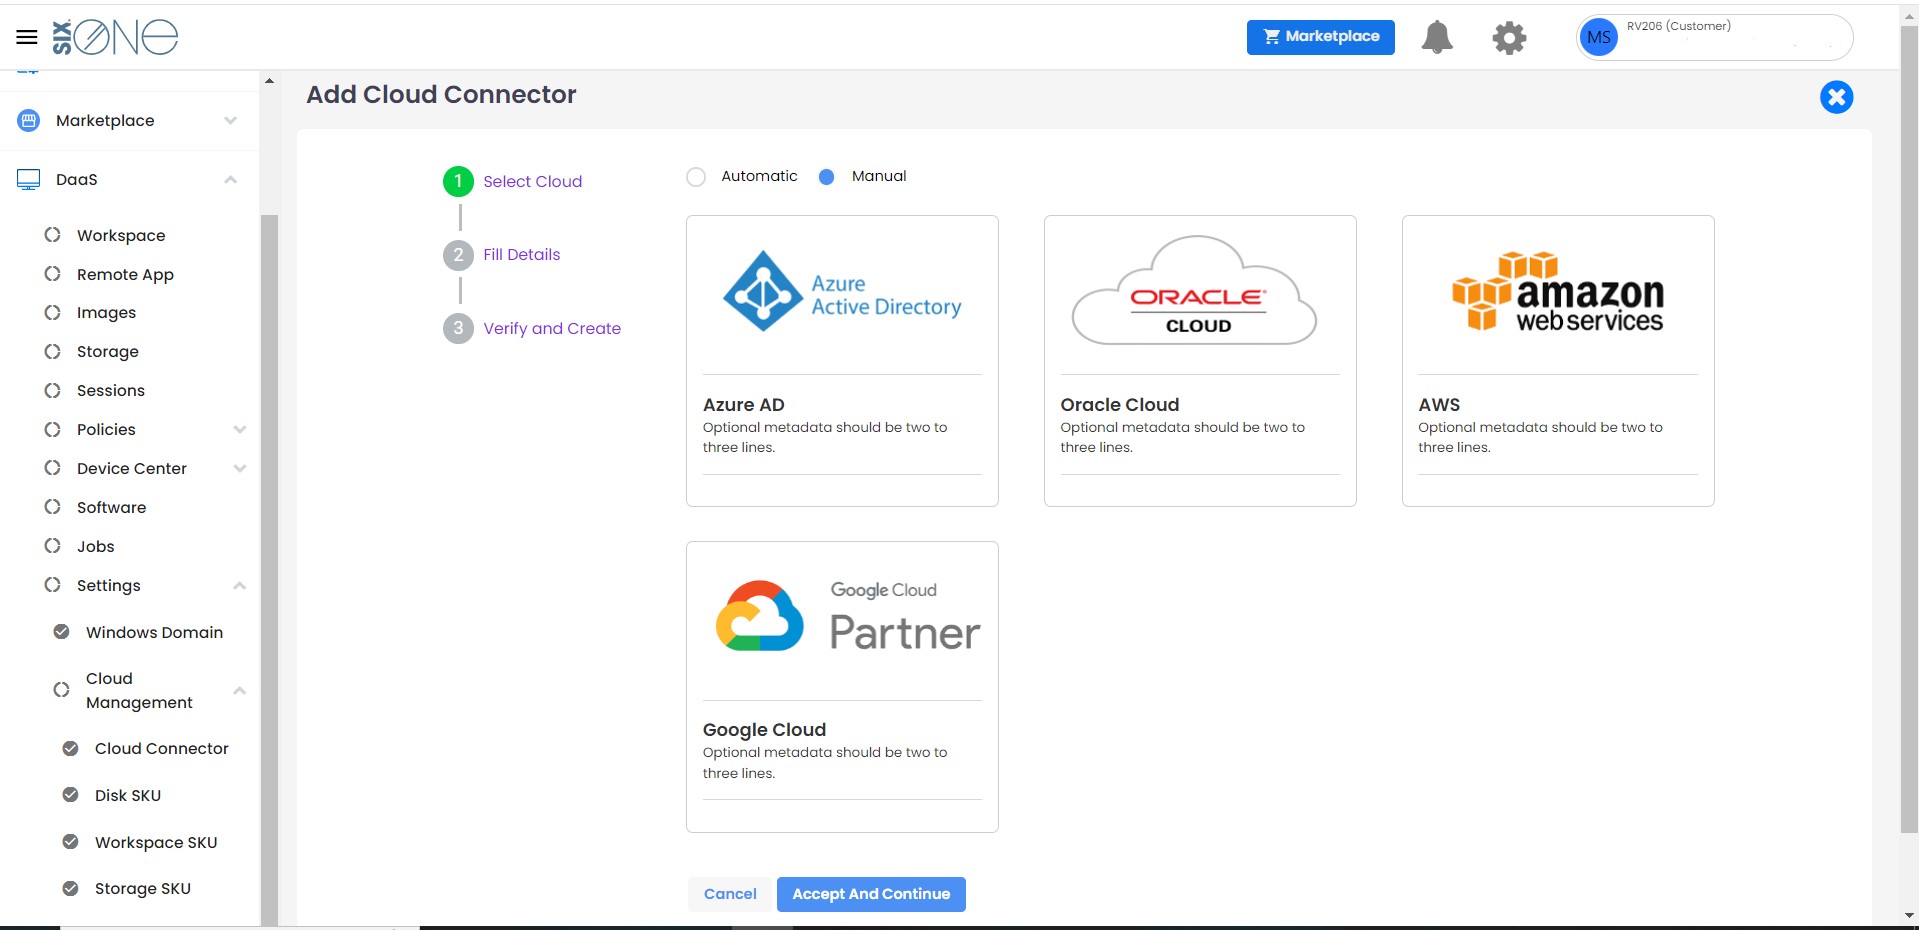
In the Cloud Connector page Customer will get option to add Existing Cloud. For that Customer have to select the appropriate Cloud connector, based on the selection they will get option to add Cloud connector details. After giving all the required details cloud connector will be added.
Two options to add cloud connector
- Automatic
- Manual
Azure
For adding the Azure Cloud connector, Select the Azure card, post selection Customer will get option to add required details.
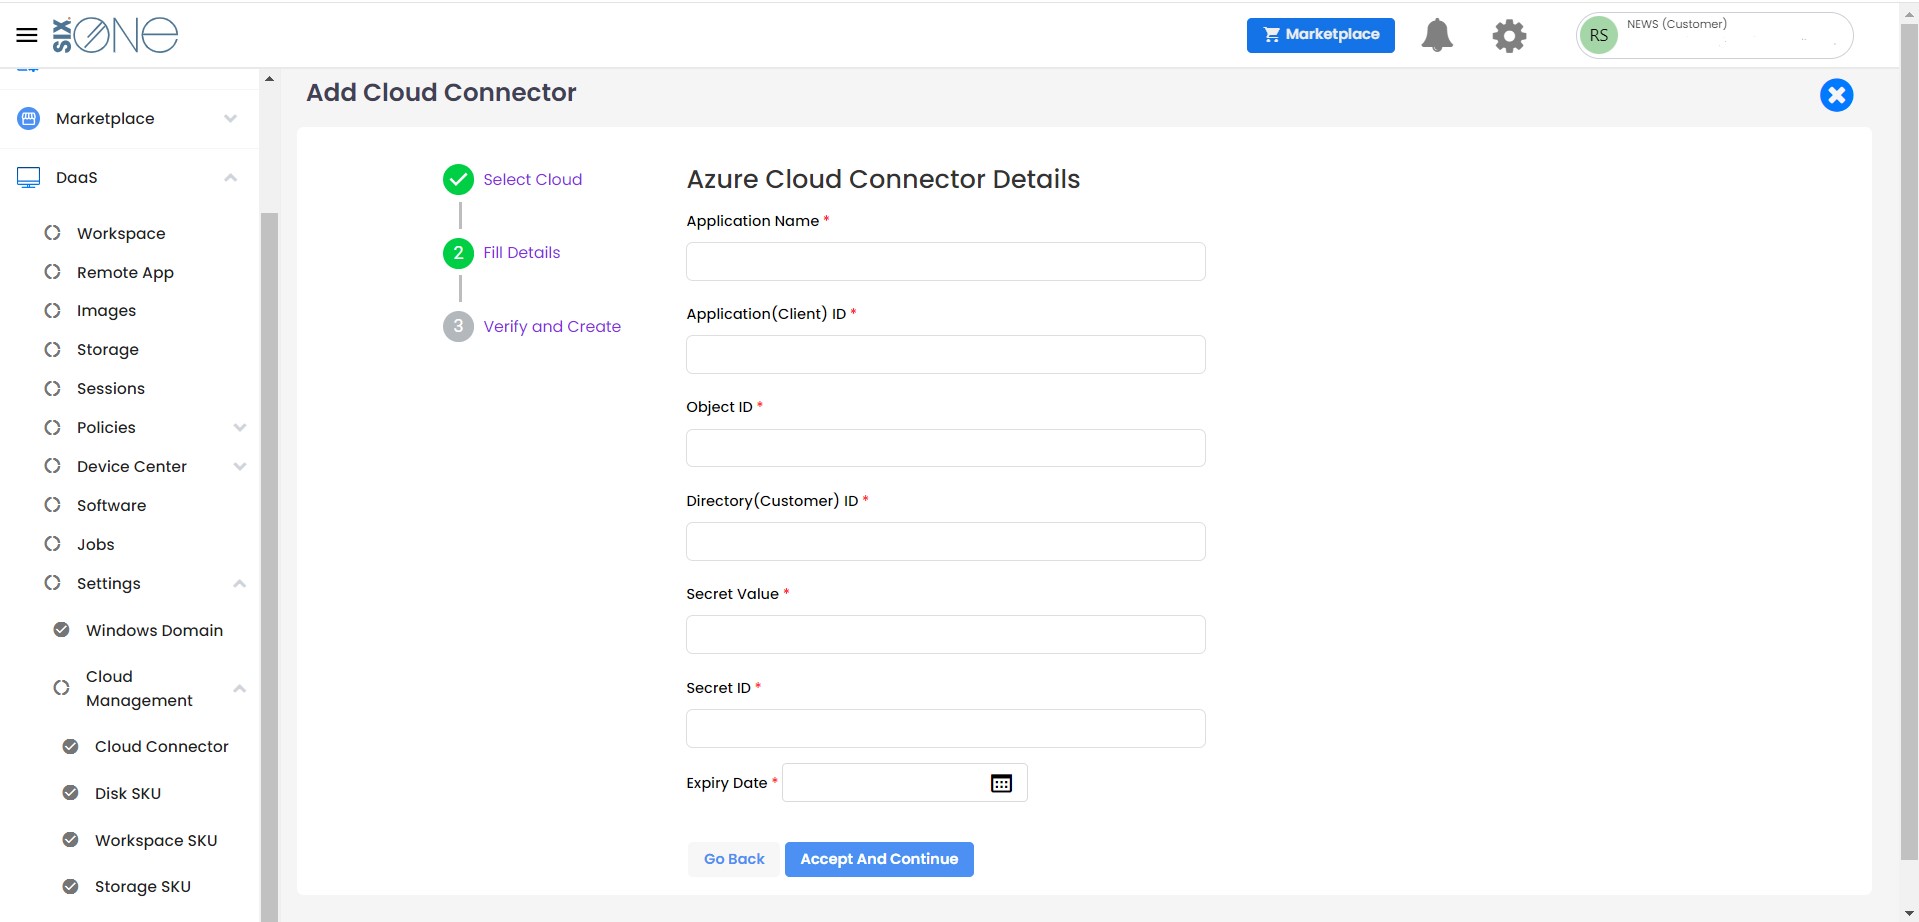
For adding Azure accounts Application Name, Application(Client) ID, Object ID, Directory(Customer) ID, Secret Value, Secret ID, and Expiry Date are the required fields. After adding this Cloud connector will be added in MSP Hub portal.
Application name - Customer can give any valid Application name.
Client Id - Azure Client Id is Active Directory Application Id. Client Id is the unique identifier of an application created in Active Directory. You can have many applications in an Active Directory. Each application will have a different access level.
- Login to Azure Portal if you are not already logged in.
- Search for Azure Active Directory
- From left Menu of Azure Directory Overview -> click App registration
- click Owned Application tab -> Click the name of the application created in previous step.
- Copy Client Id
- Object Id -
- Login to Azure Portal if you are not already logged in.
- Search for Azure Active Directory
- From left Menu of Azure Directory Overview -> click App registration
- click Owned Application tab -> Click the name of the application created in previous step.
- Copy object Id.
- Customer Id -
- Login to Azure Portal if you are not already logged in.
- Search for Azure Active Directory
- From left Menu of Azure Directory Overview -> click App registration
- click Owned Application tab -> Click the name of the application created in previous step.
- Copy Customer Id.
- Secret Value - The application needs a client secret to prove its identity when requesting a token. For security reasons, Microsoft limits creation of client secrets longer than 24 months and strongly recommends that you set this to a value less than 12 months. To add the client secret, follow these steps:
- Login to Azure Portal if you are not already logged in.
- Search for Azure Active Directory
- From left Menu of Azure Directory Overview -> click App registration
- click Owned Application tab -> Click the name of the application created in previous step.
- Click client credential -> Client secret.
- Copy the secret.
- Secret Id -
- Login to Azure Portal if you are not already logged in.
- Search for Azure Active Directory
- From left Menu of Azure Directory Overview -> click App registration
- click Owned Application tab -> Click the name of the application created in previous step.
- Click client credential -> Client secret.
- Copy the secret id.
- Expiry Date - Give the appropriate date
After adding these details cloud connector will be added to the portal.
After adding Subscription to newly added Cloud connector, Azure Cloud connector will be activated. (Add subscription option is present on the grid page of Cloud connector).
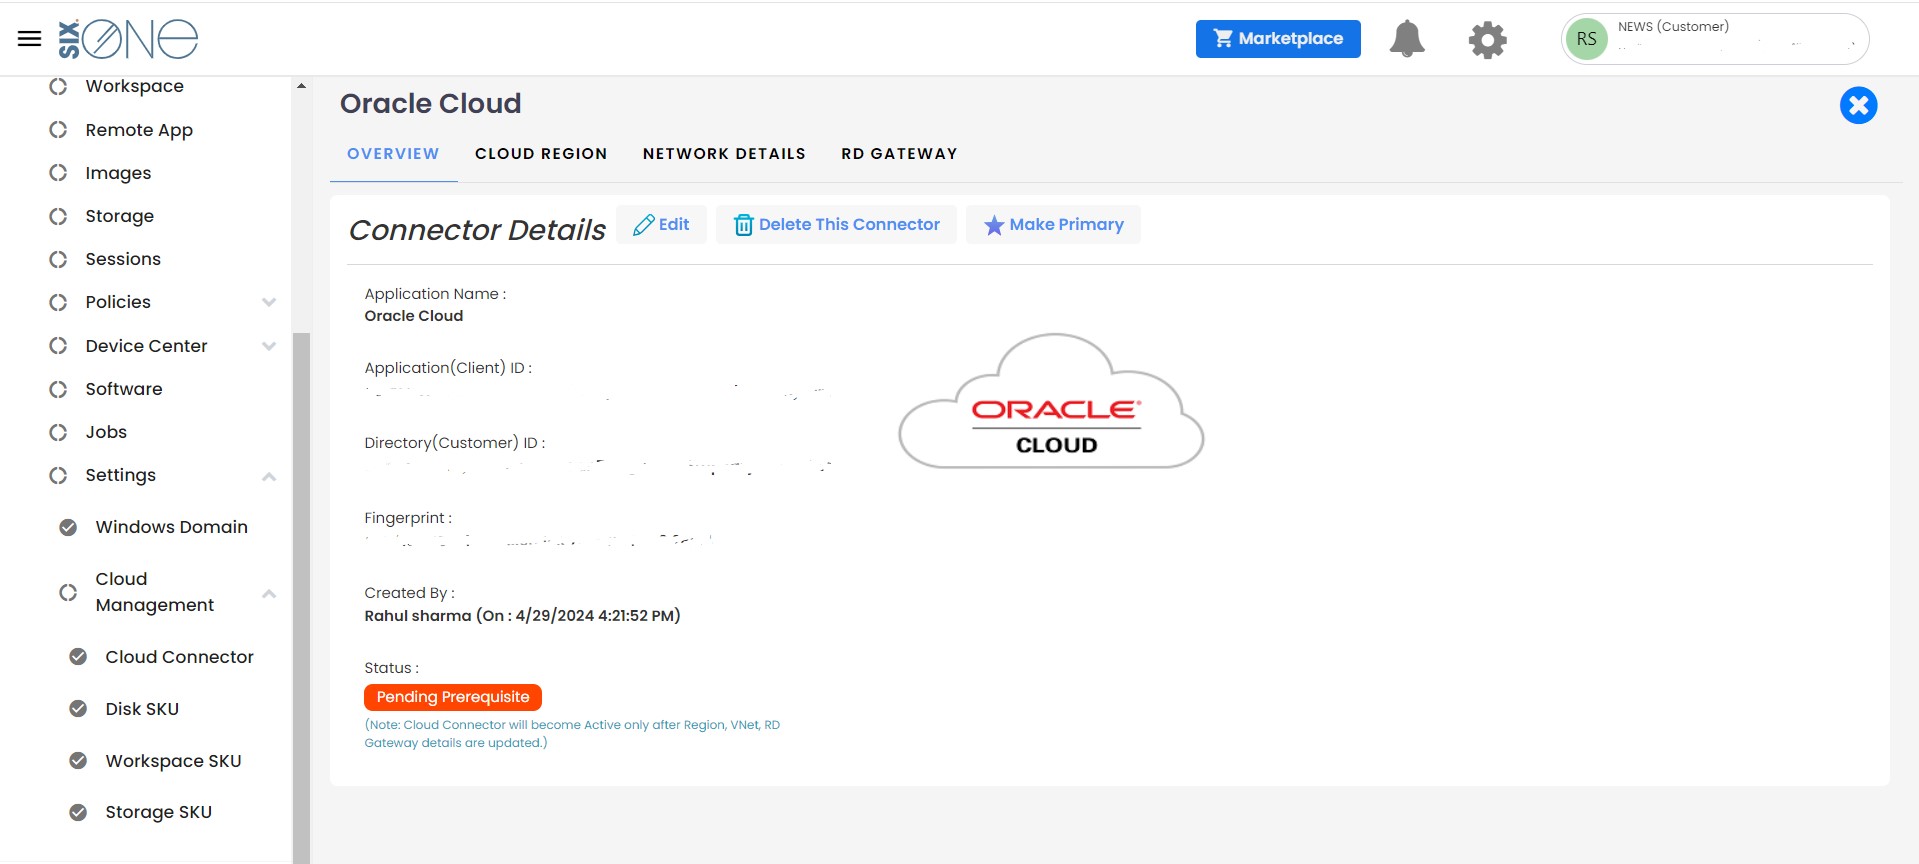
On the overview page of Cloud connector Customer will get an option to add CLOUD REGION, NETWORK DETAILS & RD GATEWAY.
OVERVIEW
Customer can manage their cloud connector in Overview page, where Customer will get option to view their account's details.
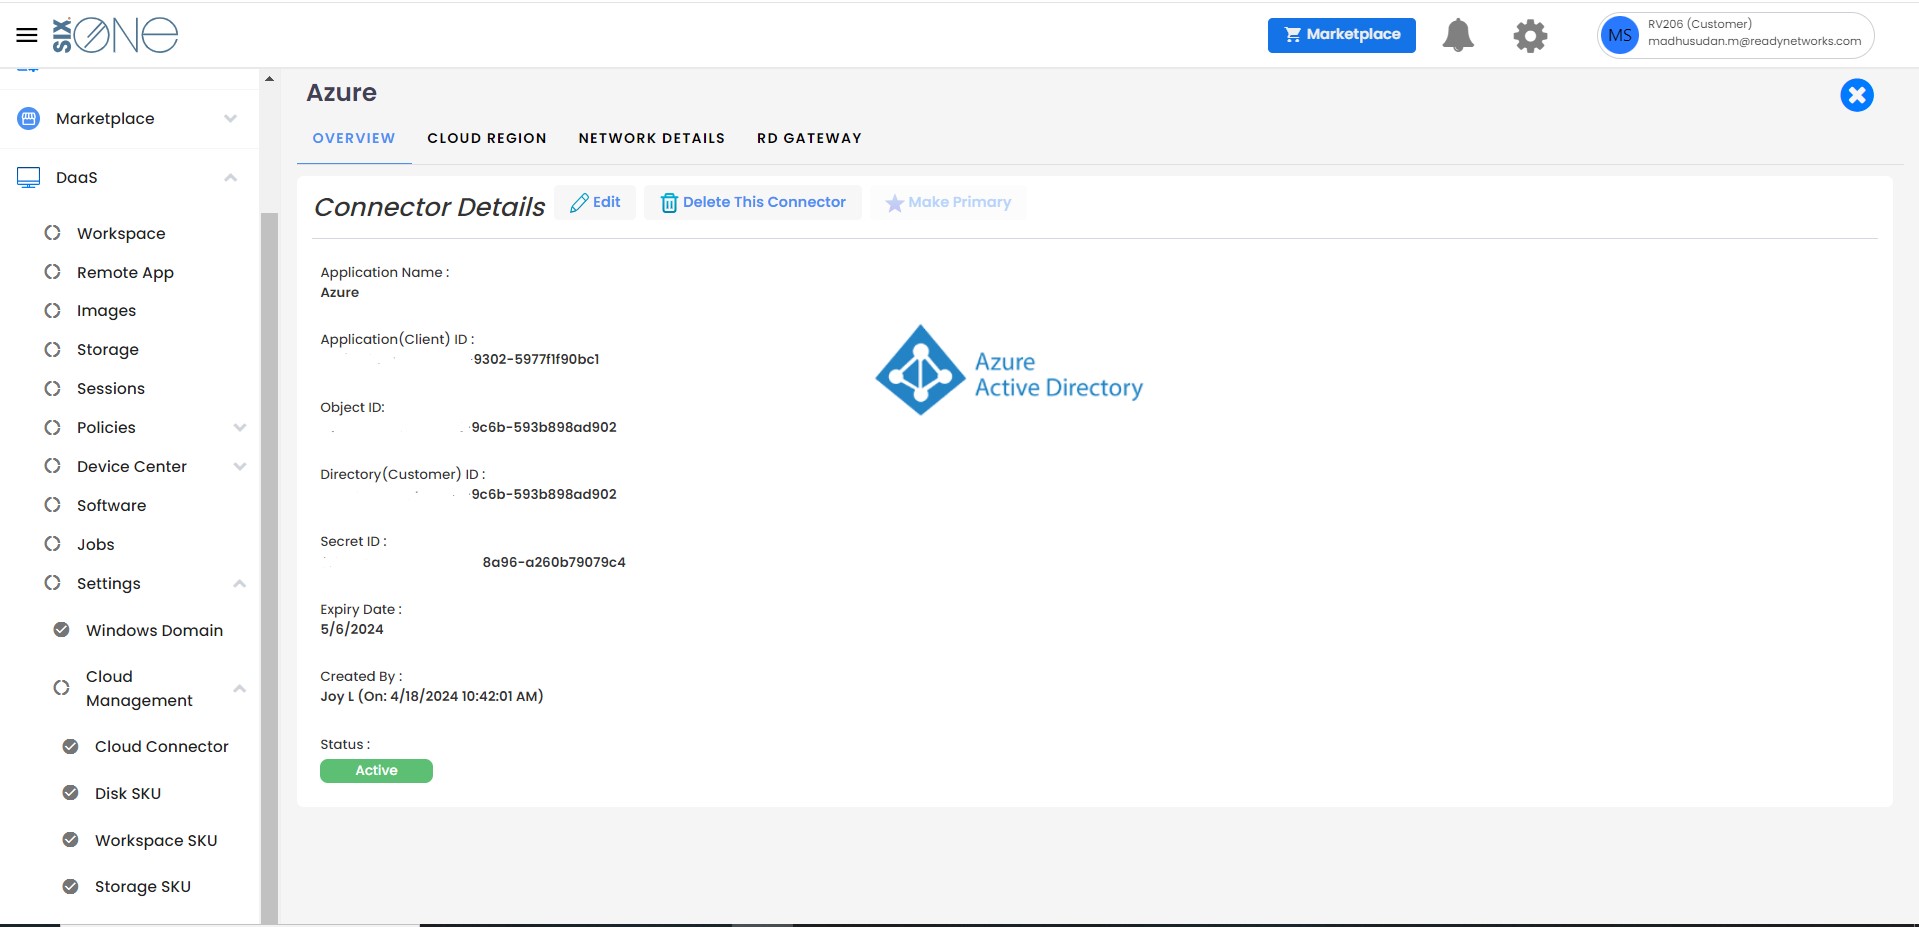
- Customer have access to edit their Cloud details by clicking on Edit details option.
- Customer can delete added Cloud connector by clicking on Delete this connector option.
Cloud Region
CLOUD REGION
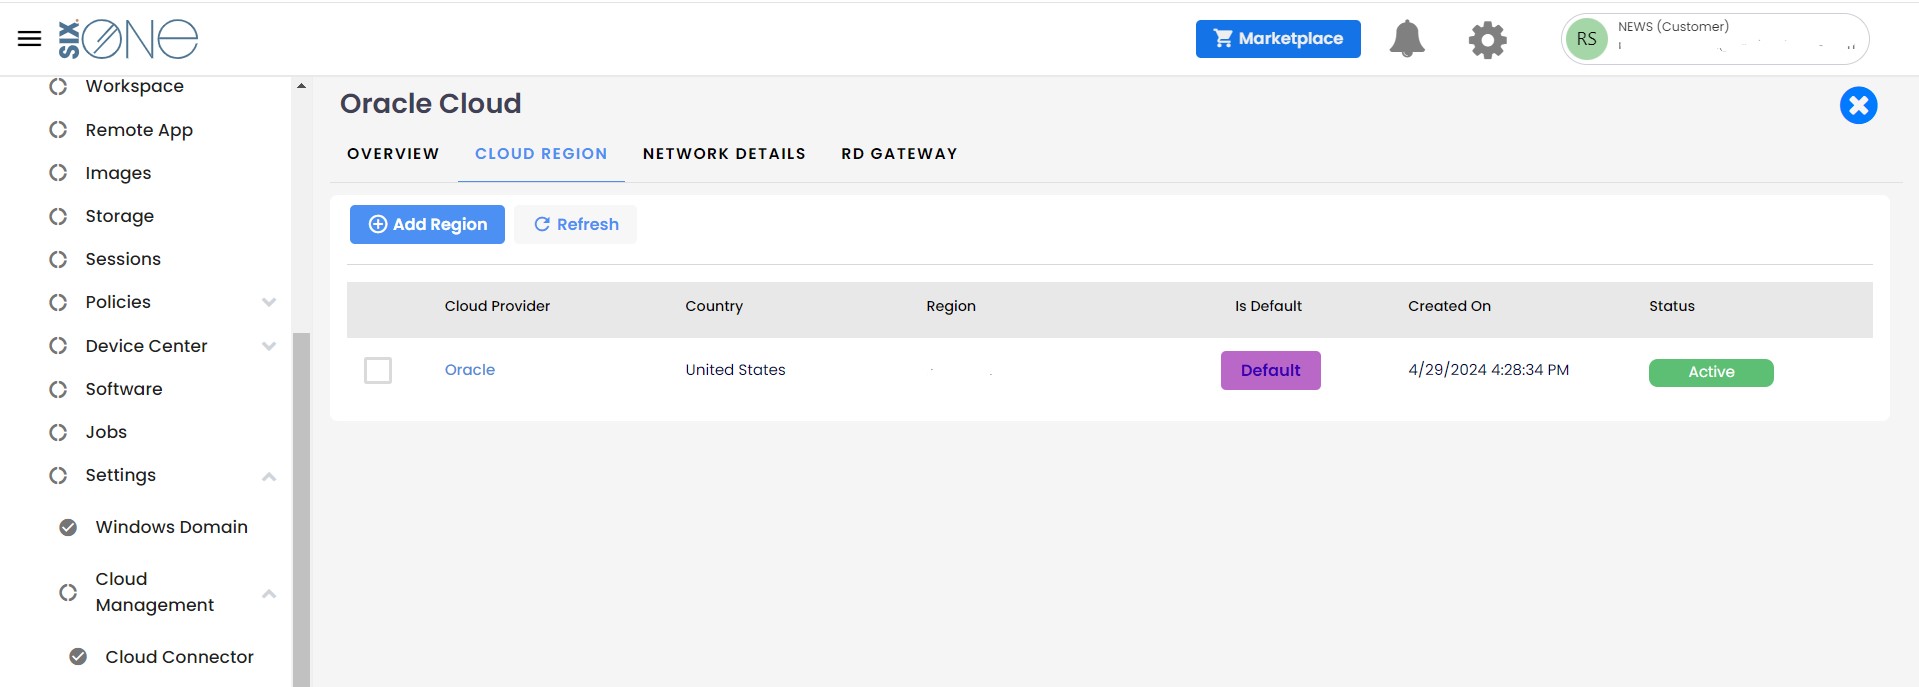
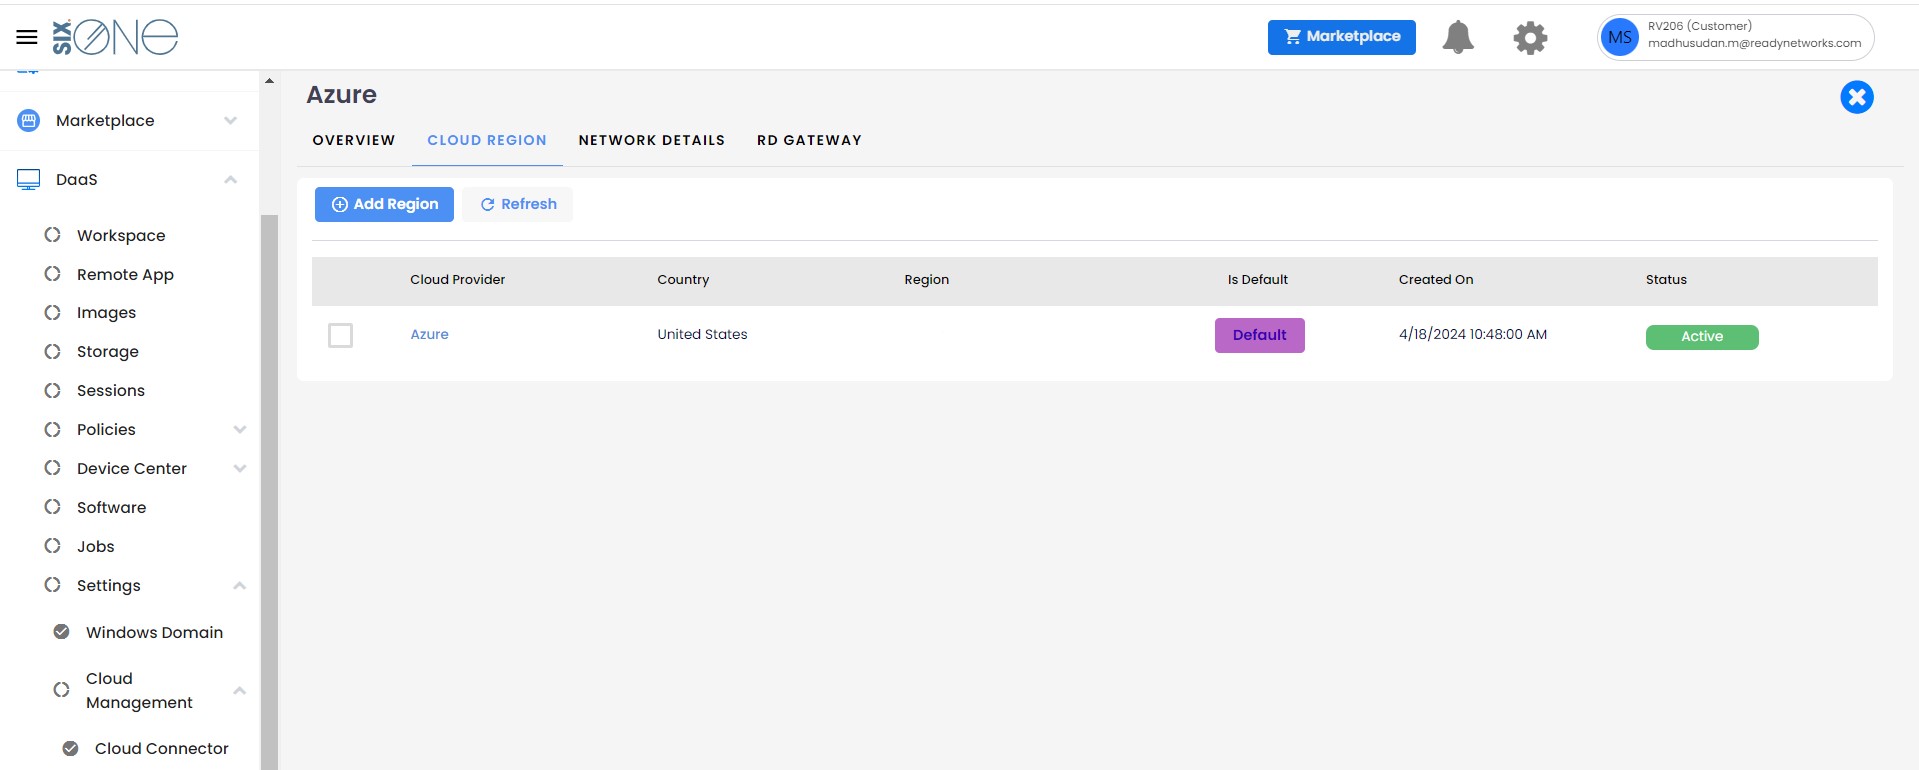
Under this features Customer is allowed to add multiple region as per their convenient. For that Customer have to click on the Cloud Region option present on the Overview page of Cloud connector. While creating Workspace Customer have option to select the Region. So added Region will display under the Region dropdown. As per the selected Region SKU and DISK will be added to specific Workspace.
NETWORK DETAILS
Under this functionality Customer can add VNET and Subnet by clicking on Add VNET
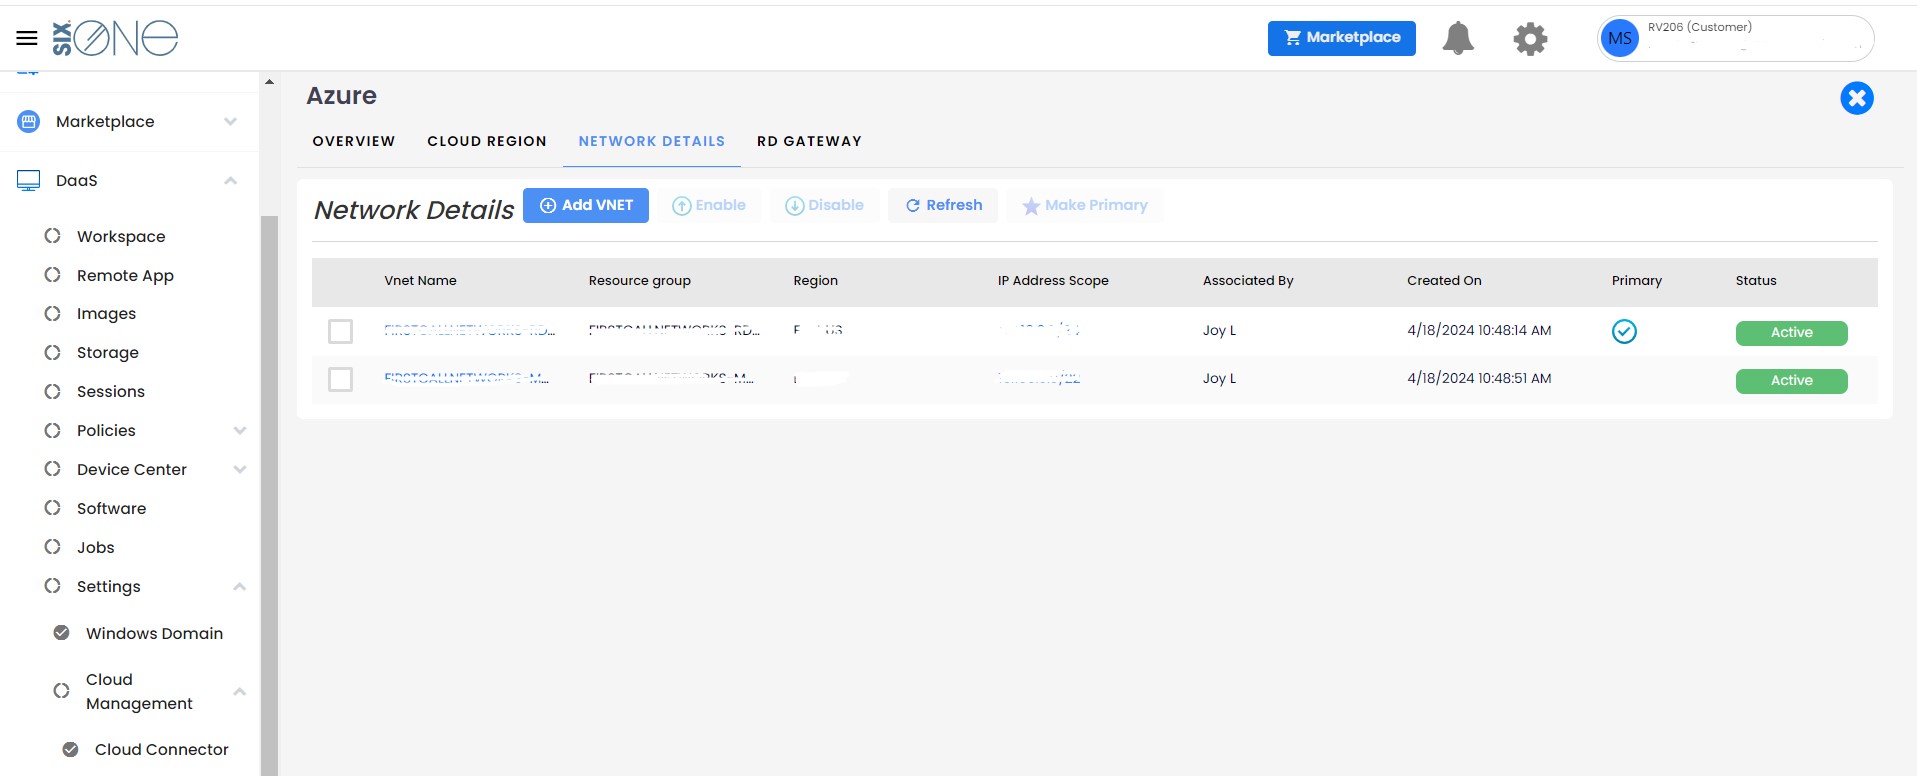
- Azure Virtual Network (VNet) is the fundamental building block for your private network in Azure. VNet enables many types of Azure resources, such as Azure Virtual Machines (VM), to securely communicate with each other, the internet, and on-premises networks. VNet is similar to a traditional network that you'd operate in your own data center, but brings with it additional benefits of Azure's infrastructure such as scale, availability, and isolation.
- Azure virtual network enables Azure resources to securely communicate with each other, the internet, and on-premises networks. Key scenarios that you can accomplish with a virtual network include - communication of Azure resources with the internet, communication between Azure resources, communication with on-premises resources, filtering network traffic, routing network traffic, and integration with Azure services.
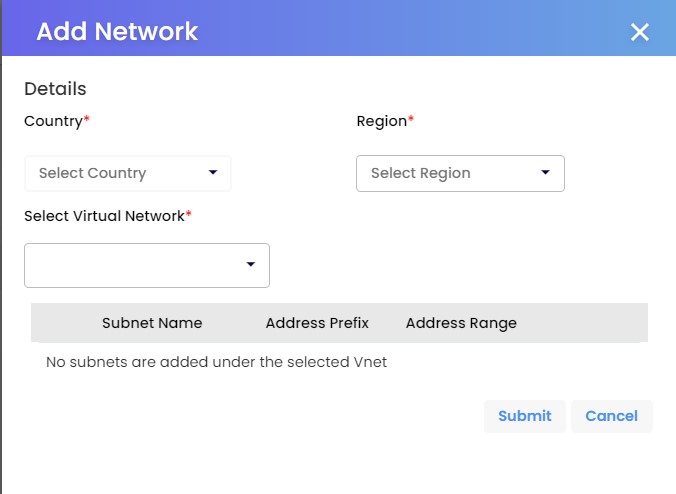
Customer can add VNET by clicking on Add VNET option, that will navigate to the Add VNET page where Tenant will get an option to choose country and Region. Based on the Country and Region selection Virtual network will be populated, Customer must select virtual network and related Subnet will be added for the Cloud Connector. The added Azure Cloud Connector will be populated while creating Hybrid type workspace.
RD GATEWAY
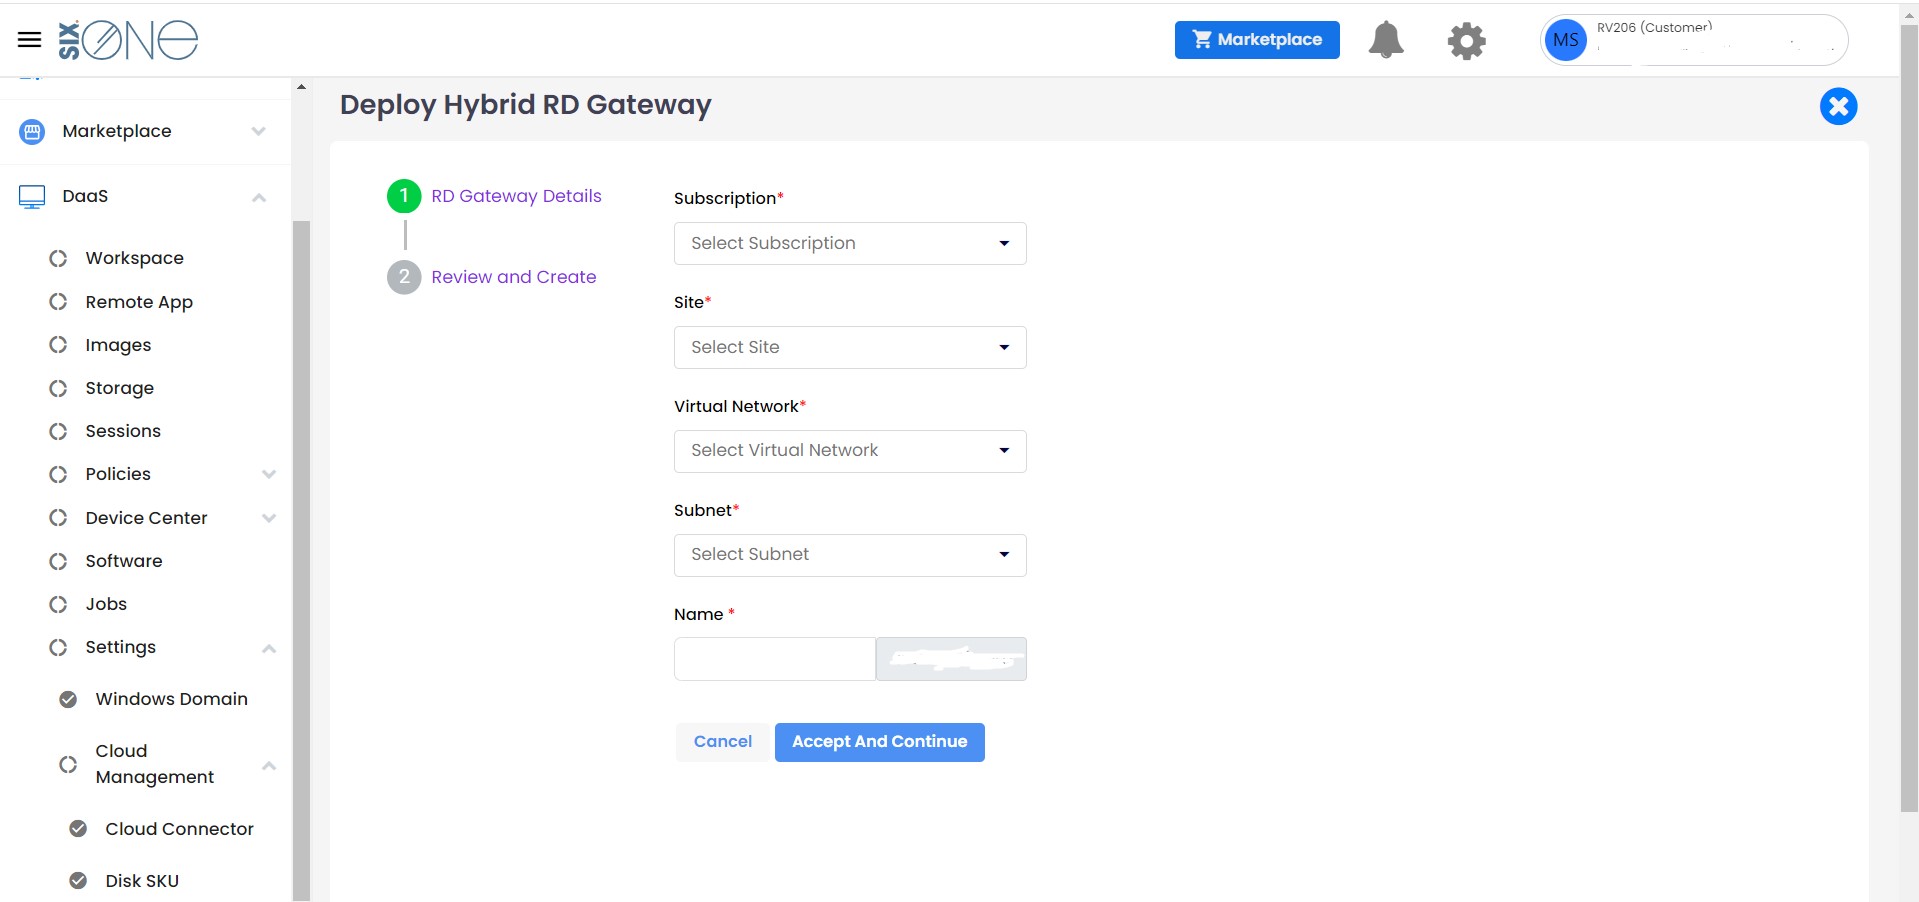
Remote Desktop Gateway is the service which allows the users to connect to the workspace or remote applications over the private network,a secured connection to server through Remote Desktop Protocol.
Under each cloud connector Customer can deploy the Remote Desktop Gateway in their Remote Desktop environment.

Pre-requisites to Deploy the RD Gateway:
- Add Cloud connector
- Add Cloud region
- Add VNET & Subnet
Enter the required fields and deploy the RD Gateway.
