SUPPORT
The Support module is available to all tenants types in MSP Hub, including Distributors, Partners, Customers, and general users. This module allows users to create and manage support tickets.

Creating Tickets:
Tickets can be created by using the Create Ticket button. Follow the steps below to create a ticket through the Create Ticket wizard, which consists of three sub-sections:
- Basic Details
- Contact Details
- Review and Create
To start, click the Create button under the Support module.
1. Fill Basic Details
Partner End:
If a Partner is creating a ticket on behalf of a Customer, an additional field is displayed in the Basic Details section of the ticket creation wizard. This field, labeled Customer, is a drop-down menu where the Partner can select the Customer for whom the ticket is being created. The ticket number will be prefixed with CT, and the Customer can see this ticket in their tenant as well.
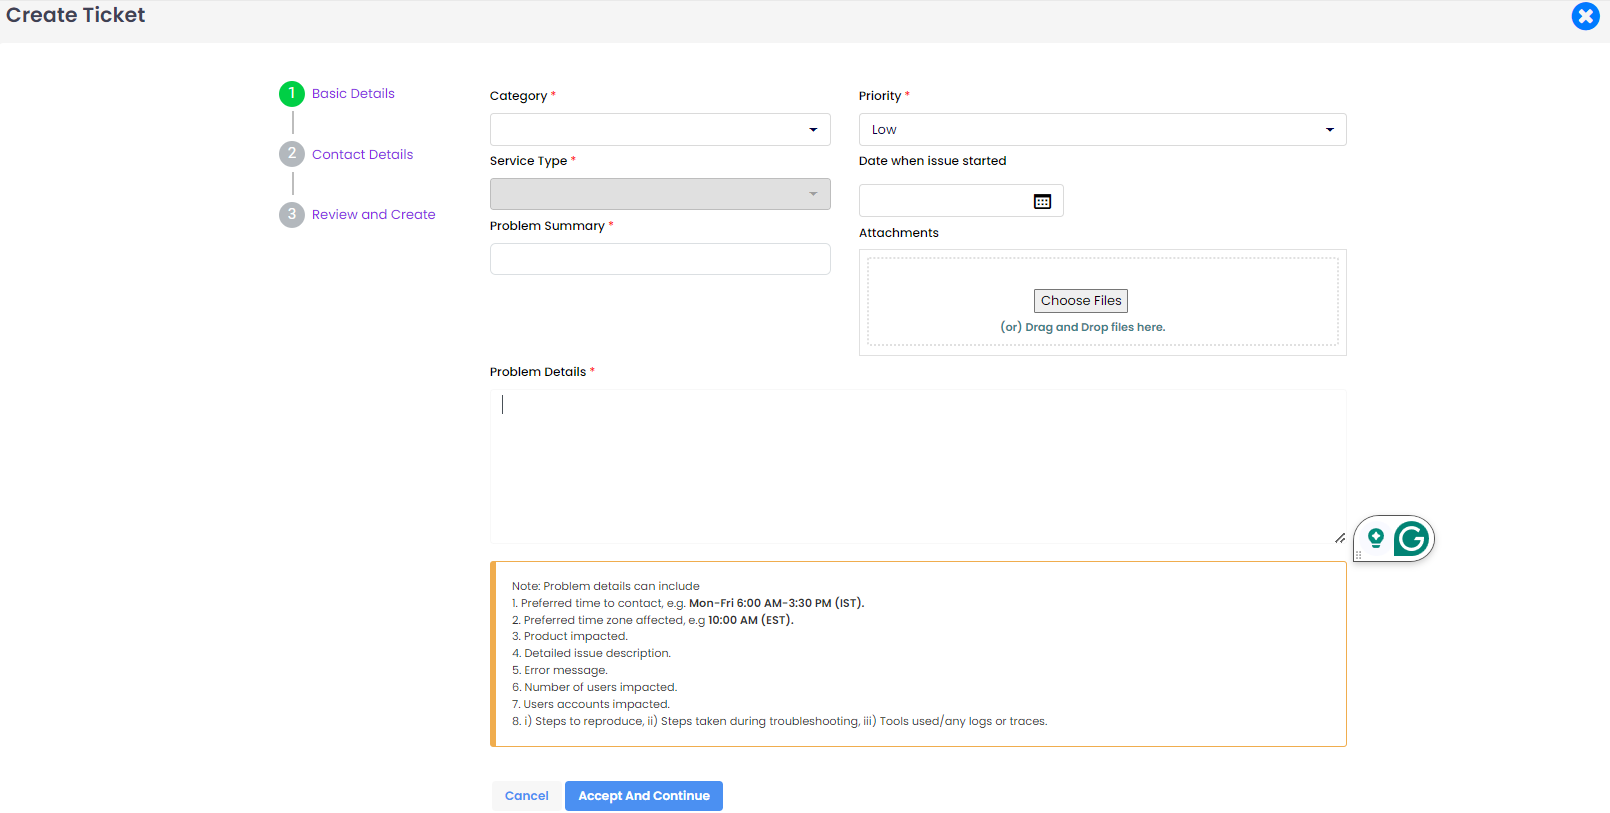
Customer: Select the customer from the drop-down list.
Customer End:
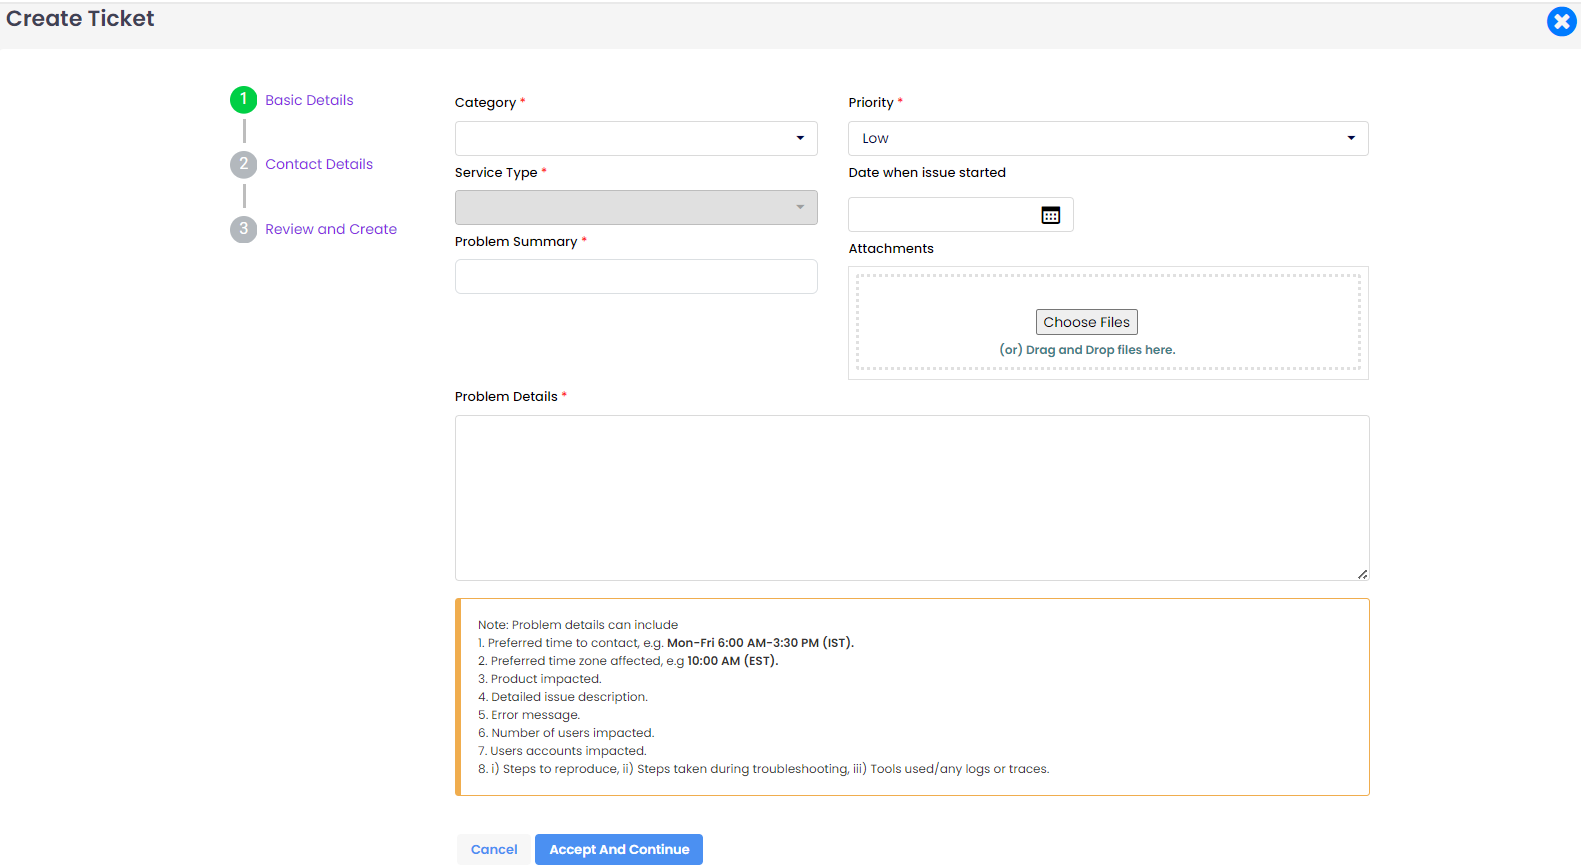
Category: Select the category the issue belongs to from the drop-down list.
Service Type: Select the type of service issue you are facing from the drop-down list.
Priority: Set the Priority of the tickets based on impact.
→ Critical - Severe impact, immediate attention needed.
→ High - Significant impact, requires quick resolution.
→ Medium - Moderate impact, needs timely attention.
→ Low - Minor impact, can be addressed later.
Date when issue started: Select the date when the issue began to impact.
Problem Summary: Briefly describe the problem.
Problem Details: Provide a detailed description of the issue.
Attachments: Add supporting attachments to help the technician understand the issue better and provide a quicker solution. You can add attachments by dragging and dropping the file in the attachment section or by selecting from folders.
Once you have entered these details, click on the "Accept and Continue" button to navigate to the next page, which is Contact Details.
2. Add Contact Details
Name: The system will default to the logged-in username. If you are creating a ticket on behalf of someone else, select the appropriate name.
Phone Number: The system will default to the logged-in user's contact number. If you are creating a ticket on behalf of someone else, select the appropriate contact number.
Email: The system will default to the logged-in user's email. If you are creating a ticket on behalf of someone else, select the appropriate email.
Add Additional Users Email: This optional field allows you to add the email addresses of additional individuals who need to be notified about ticket activity. Multiple email addresses can be added by separating them with commas, e.g., abc@example.com, def@example.com.
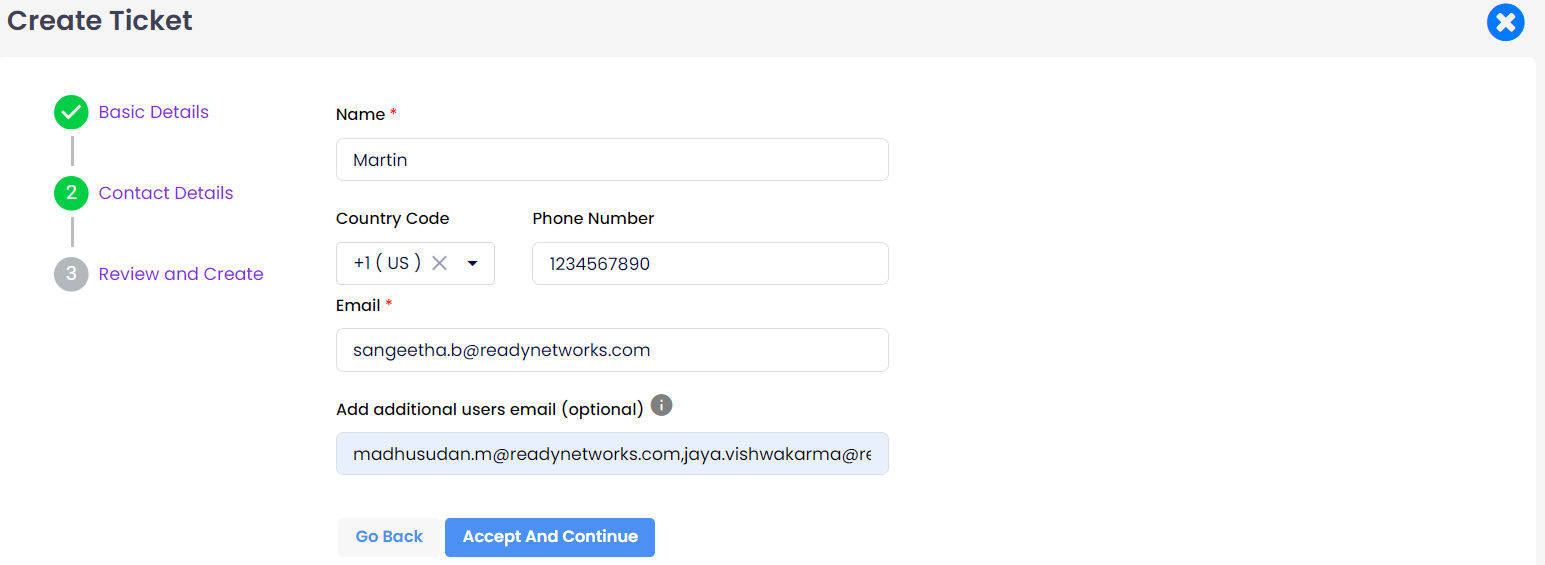
Once you have entered these details, click on the "Accept and Continue" button to navigate to the next page, which is Review and Create.
3. Review and Create
This page allows users to review the data entered for creating tickets and make any necessary edits. Once all the information is correct, click on the "Review and Create" button to create the ticket.
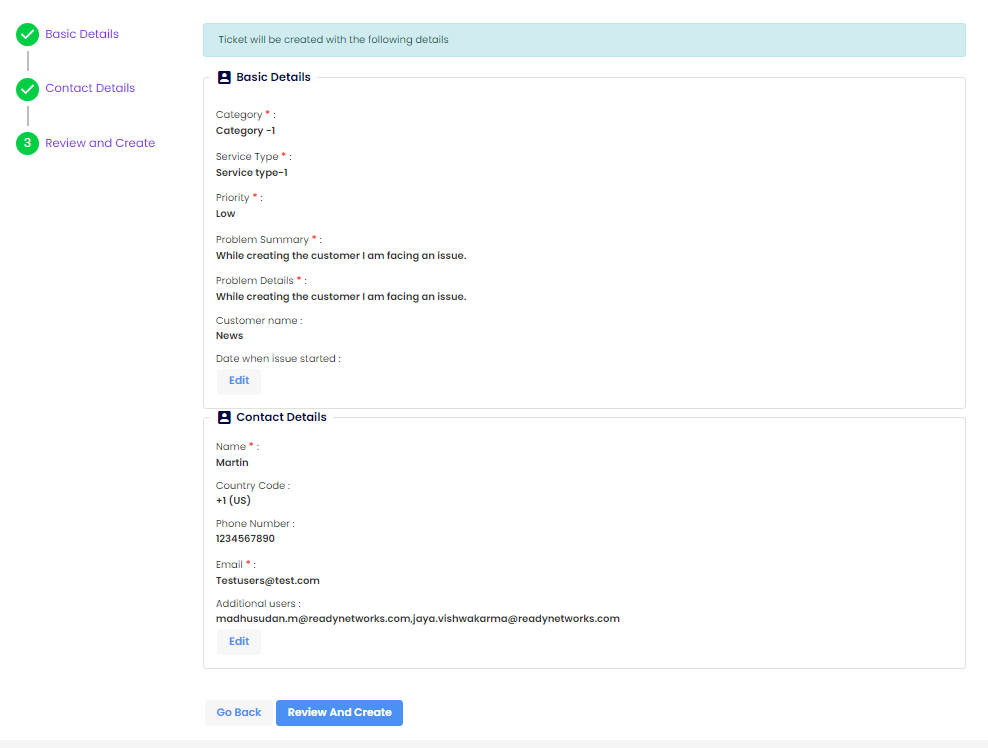
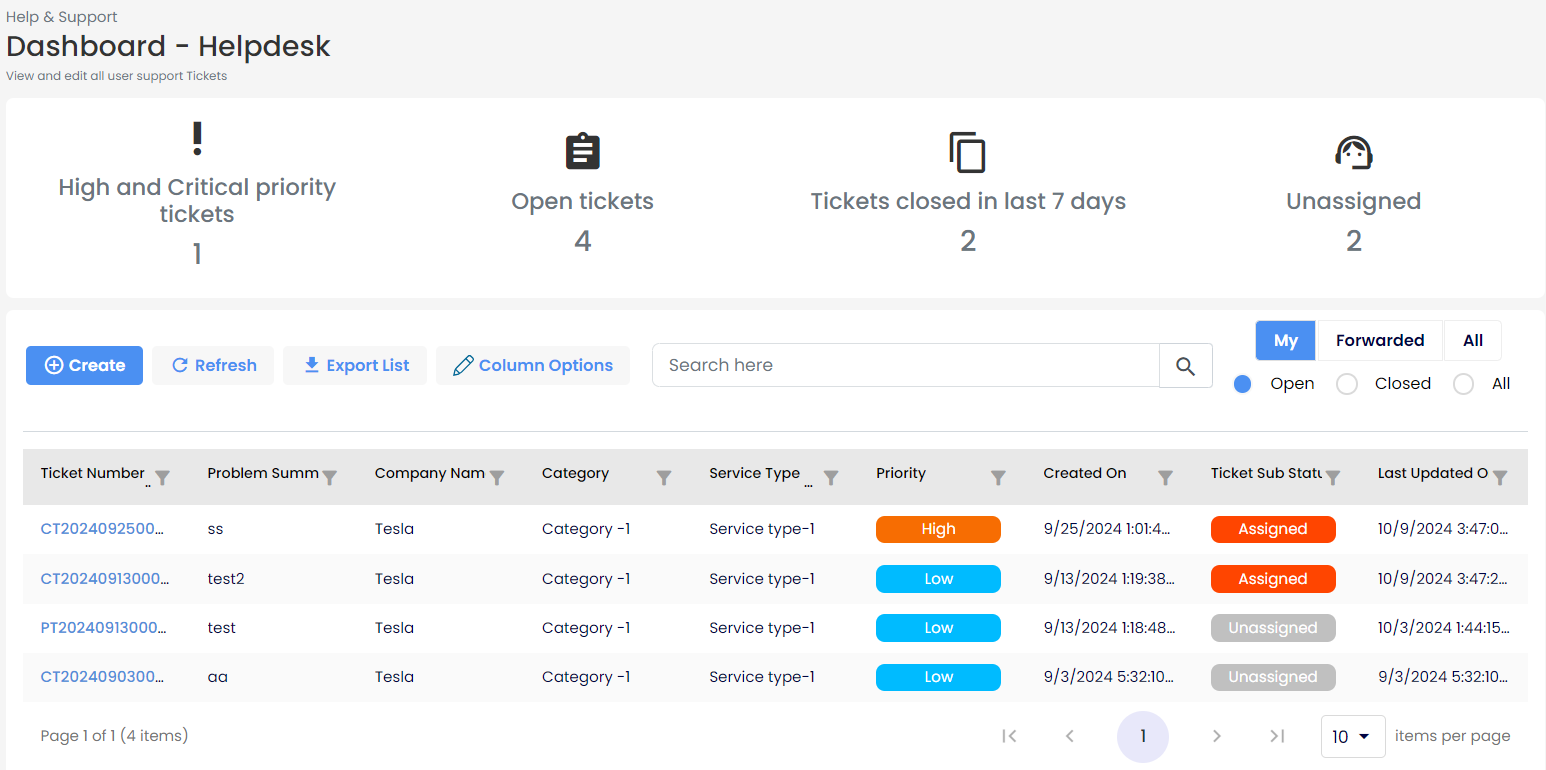
The ticket is created and is listed under the dashboard.
Note
For easy identification of who has created the ticket, the ticket number will be prefixed as follows:
- CT for Customers
- PT for Partners
- DT for Distributors
↠ Customer created ticket

↠ Partner created ticket

↠ Distributor created ticket

Note
For Customers to configure Helpdesk, the Allow Helpdesk Configuration option must be enabled from the Customer Overview page, accessible via Partner login.

Once the "Allow Helpdesk Configuration" is enabled in the partner tenant, the following options are also enabled in the customer tenant: Support, Dashboard, My Tickets, and Configurations.
FAQs
Q. As a customer if i created ticket for any critical issue, how much time support team will take to resolve my ticket?
A. It depends upon the complexity of the ticket.