SECURESIGN
SecureSign refers to electronic signatures, which are digital equivalents of handwritten signatures used to authenticate documents and transactions in the digital world. E-signatures are legally recognized in many countries and can streamline document workflows by eliminating the need for physical signatures and paperwork.
We at Ready Networks are now providing this feature in SIX.ONE product as "SecureSign". This is a license-based feature. Based on the license type purchased user can work on allowed documents in that license.
Types of Licenses for SecureSign:
- Basic (Users can create up to xx documents)
- Standard (Users can create up to xx documents)
- Premium (Users can create up to xx documents)
- Unlimited (Users can create up to xx documents)
Pre-requisites for accessing Securesign
- User should purchase the SecureSign license product from the Marketplace.
Marketplace → Six.One → SecureSign product. - License should be assigned to the users.
- User should have either Global admin/Document Administrator/Document Contributor roles and permissions.
- User can even assign "Custom" role, related to SecureSign as well.
Once a user is permitted to use SecureSign, follow the below steps to create, publish and sign the document.
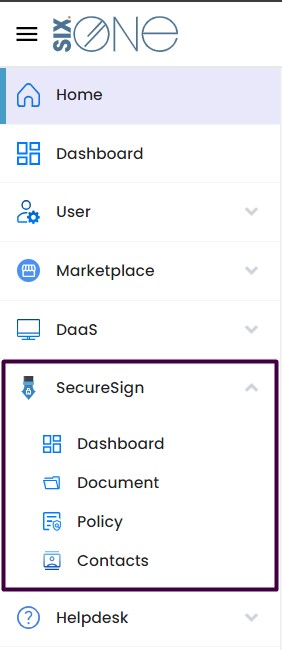
- Click on SecureSign from left main menu.
- Click on Document sub menu.
Document grid page is displayed where in below options are displayed
a. Create Document - Click on this option to create new document for signing.
b. Refresh - Refresh the page.
c. Export List - Export the document list to excel.
d. Search - Search the created documents.
e. Filter - filter based on document status.
f. Document lists - Lists all the documents created.
Create Document:
Kindly follow below steps to create a document for SecureSign:
- Click on Create Document button displayed in Document page.

- Create Document page is displayed.
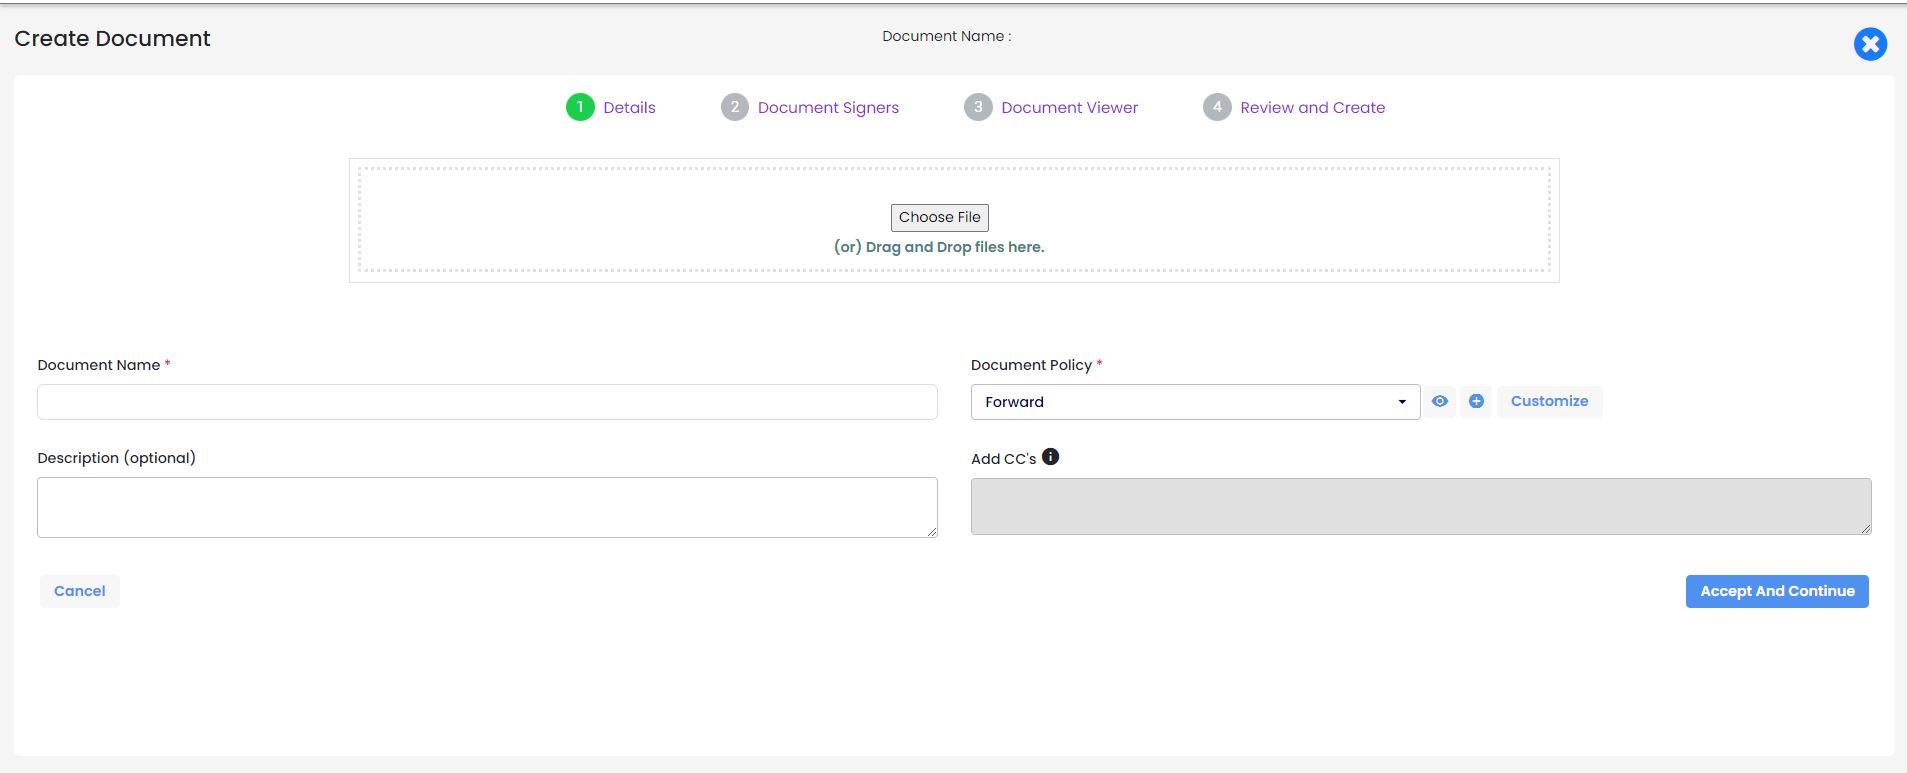
Enter following fields to proceed further for document creation for signers.
a. Document Name - Enter the desired document name here (This field allows alphabets, special character and numeric)
b. Upload Attachment - Add PDF as an attachments.
i. This is a place where the user can attach/upload the document file that needs to send for digital signing.
ii. User can upload DOC, .DOT, .DOCM, .DOTM, .DOCX, .DOTX, .RTF, .WordML, .XLS, .XLSX, .XLSM, .XSLT, .PPTX, .PPTM, .POTX, .POTM, .PDF and it supports up-to 35MB of file size. Uploaded file gets converted into PDF format.
iii. User can upload here either by choosing the file from folder or by drag and drop of file in the attachment box.
c. Document Policy - Select or add the Policy.(Click here to know more about Policy)
d. Add CC's - Add email id of the user whom the user wants to keep notified. This field supports multiple email ID which need to be separated by comma.
e. Description - Add the description for the documents.
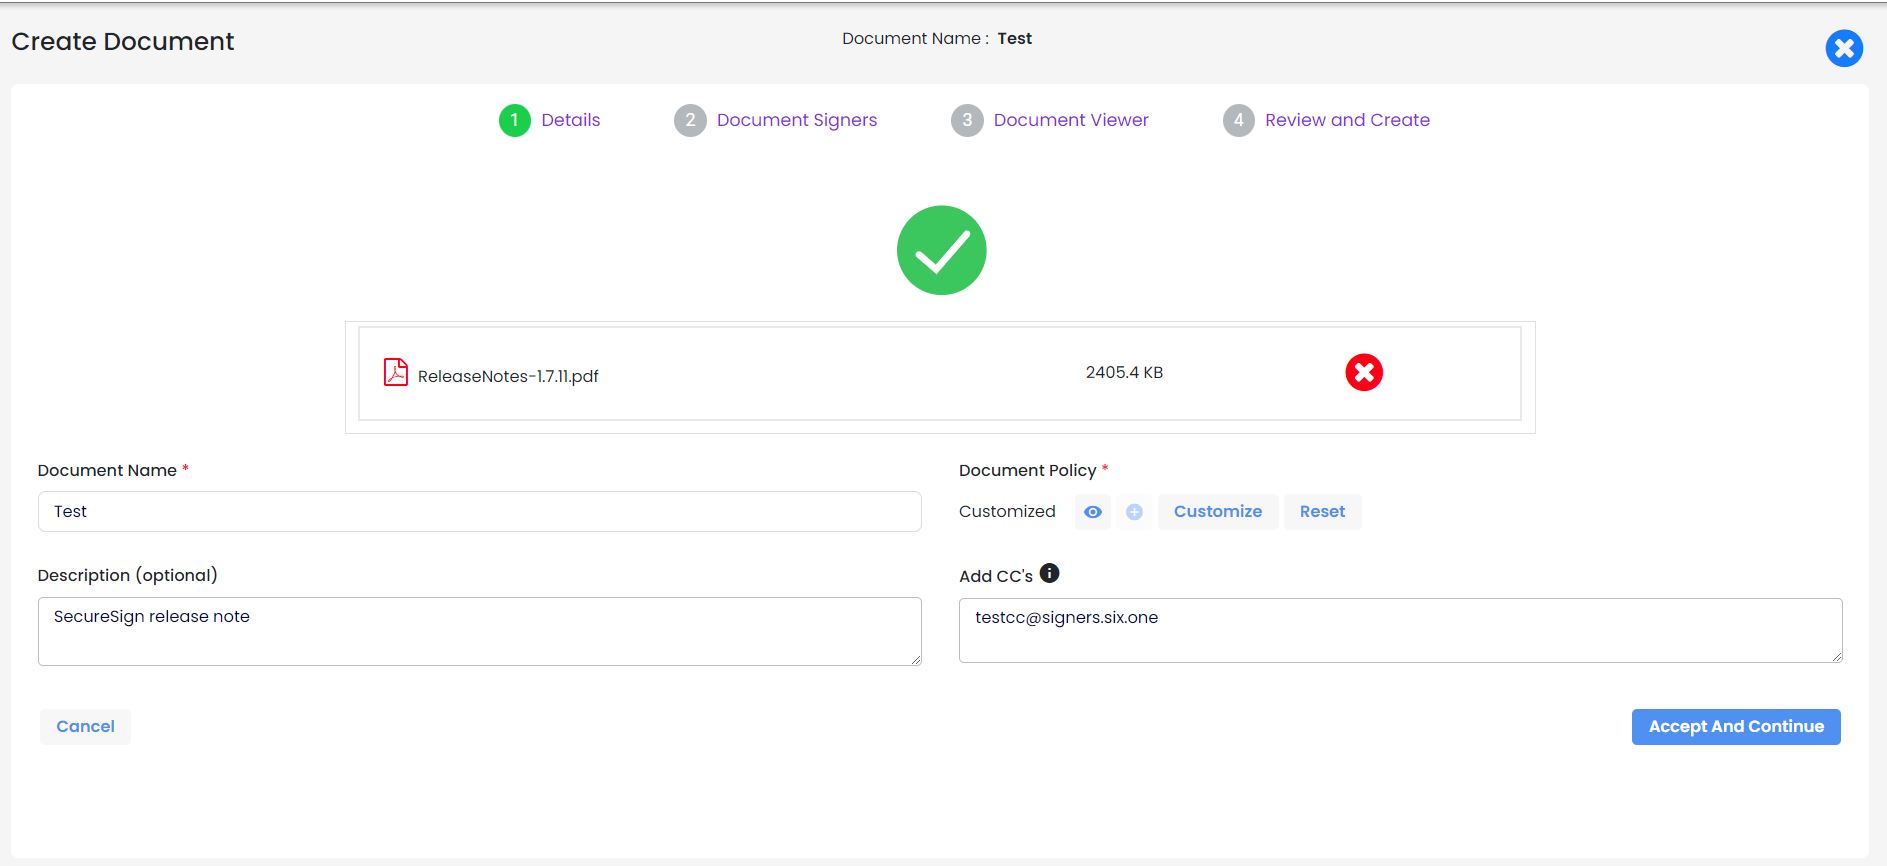
Click on Accept and Continue
- Document Signers page is displayed.
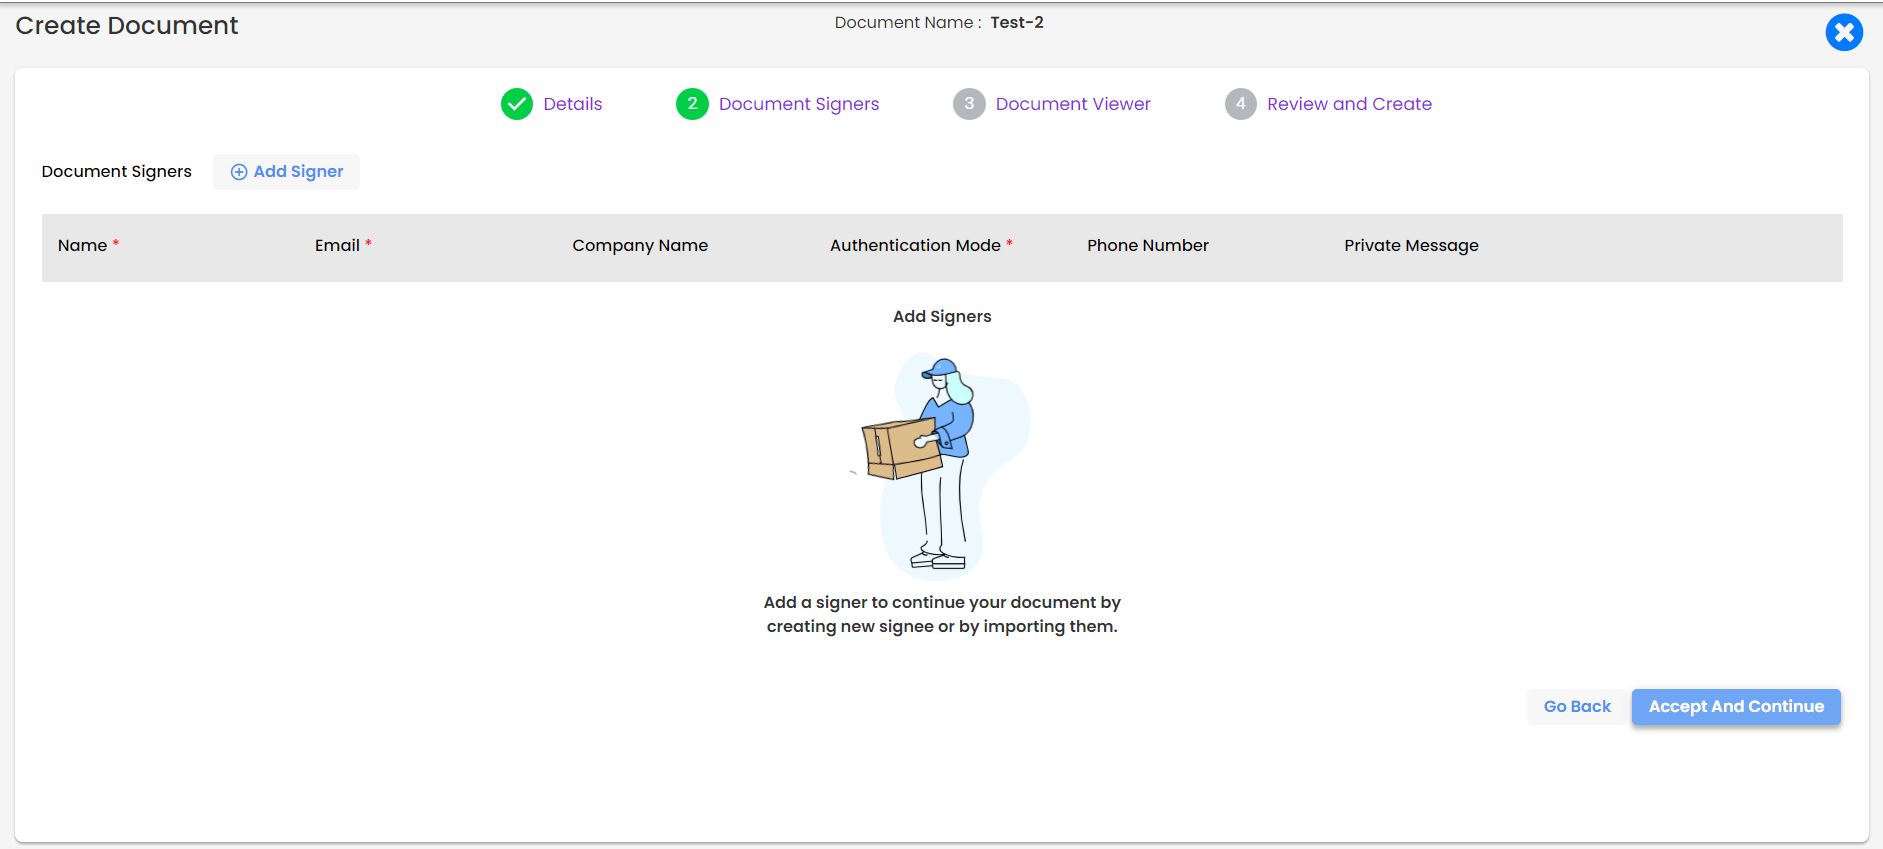
Signers who are part the signing the document those signers details need to add by clicking on Add signer button.
a. Enter Signer Name
(If signer details is saved in contact page. it will be auto suggest by clicking on signers name all others details will be auto filled)
b. Enter Signer Mail ID
c. Enter signer Company name
d. Select Authentication mode
e. Enter signer phone number (Mobile authentication mode selected)
f. Private message - This is an Optional field where in the creator can add a message if needed.
g. Once a Signer is added click on Tick button to add him as Signer.
h. Added Signer can also be edited once added using the Edit (Pen Icon) button.
i. Added Signer can also be deleted using the Delete button.
Click on Accept and Continue button.
- Document viewer page is displayed
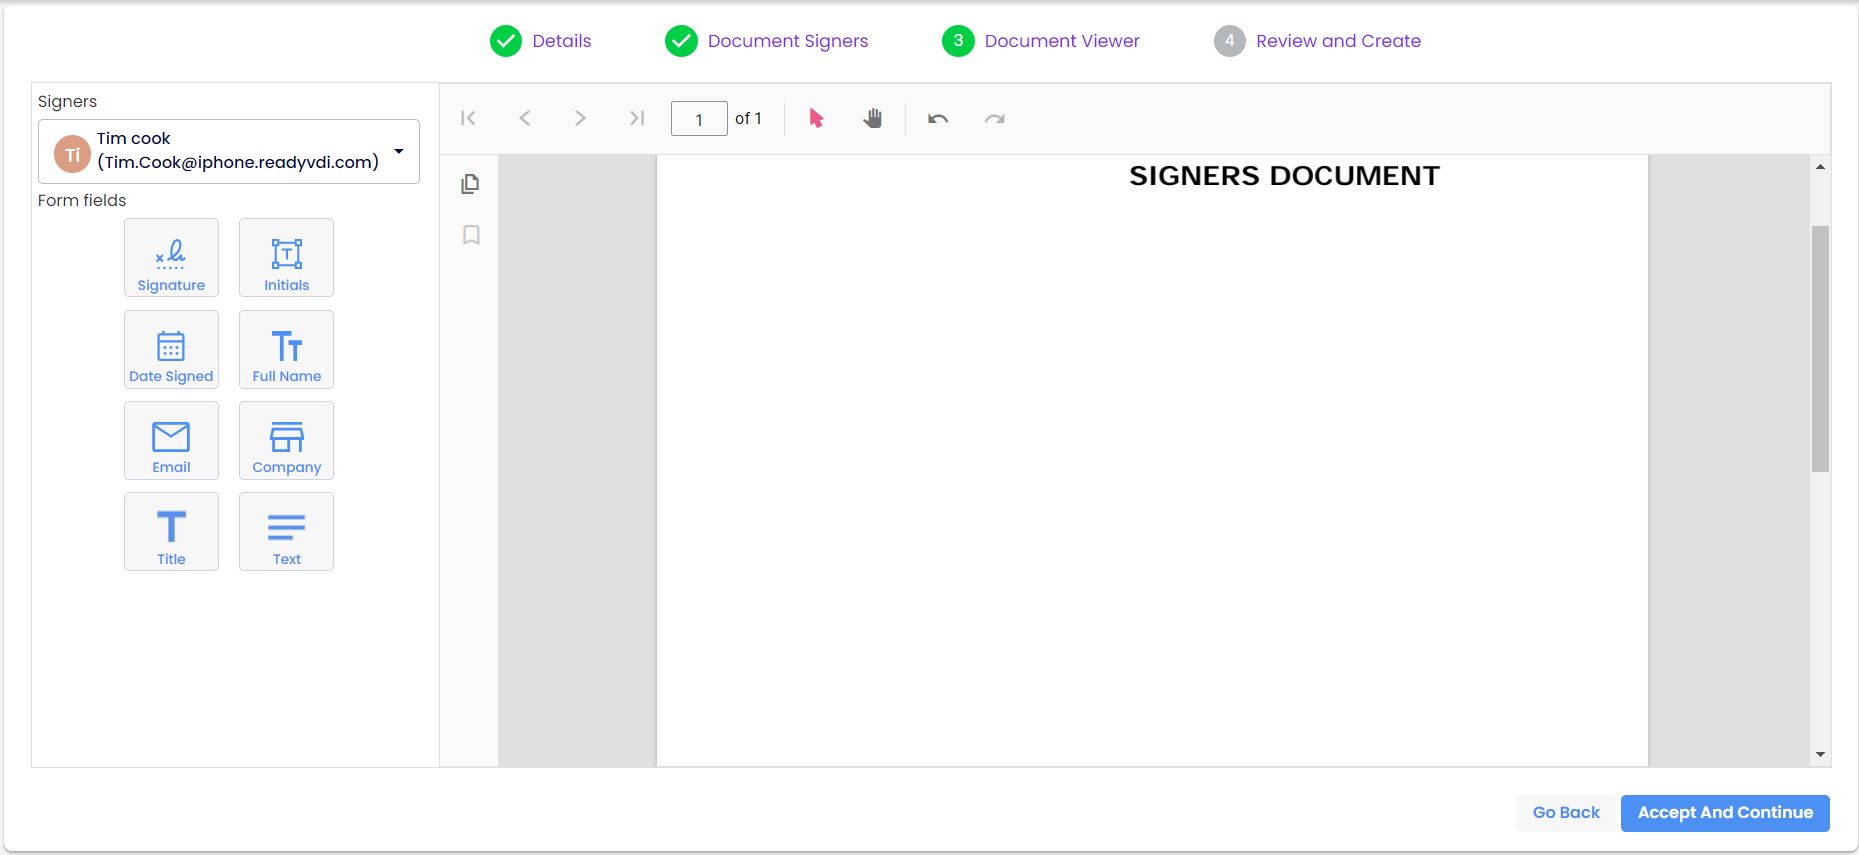 In document viewer page signing text field are added. One signer can have multiple signing fields. Those signing text field can resized according to requirement and can place any part of the document. Multiple signers text field can added and to differentiate between them different colour grading is provided. Along with signing text field we also add other farm fields which includes,
a. Initial : in this field signer is able to enter his initials.
b. Signed Date : in this field date will be displayed on which signer signed the document.
c. Full Name : this field contains signer full name.
d. Email : this field contains signer email id.
e. Company : this field contains signer company name.
f. Title : this field contains title.
g. Text : in this field signer can enter his message text which he wanted to send for document owner.
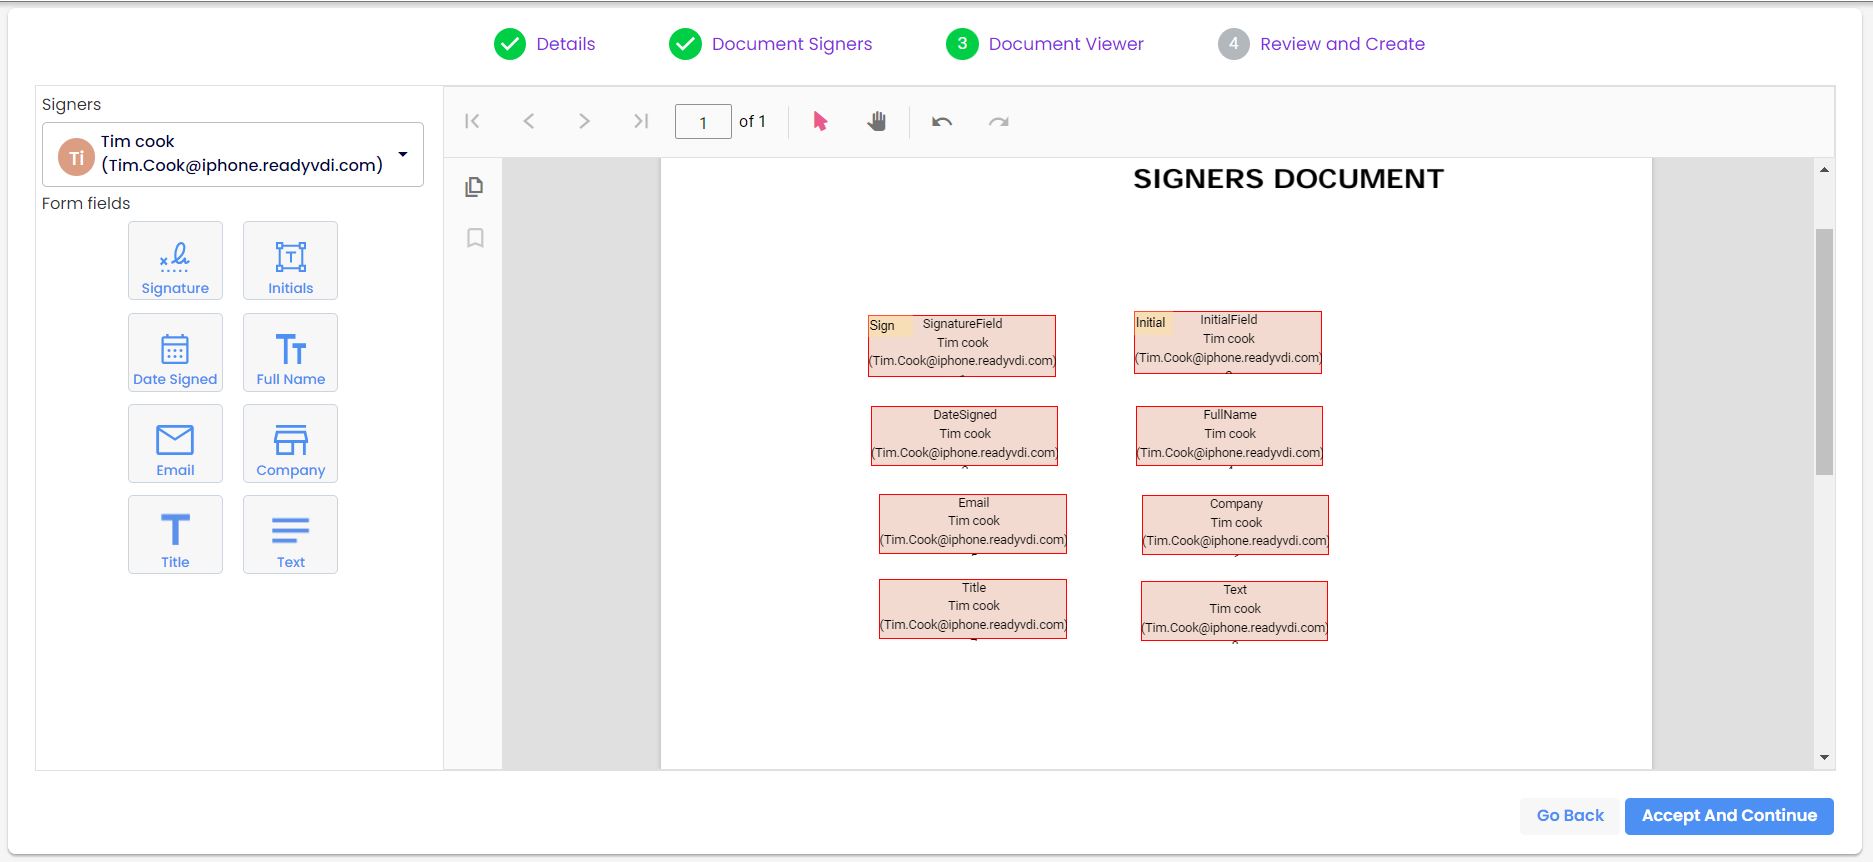
Once adding signing fields of Signer click on "Accept and Continue" button
Review and Create page is displayed.
Now document owner can able to review the document all the details of the document will be displayed here.

Click on review and create button document will be created and status of the document will be draft status.
a. On clicking view document button.the page will navigate to document overview page.where we can see detail view of document.
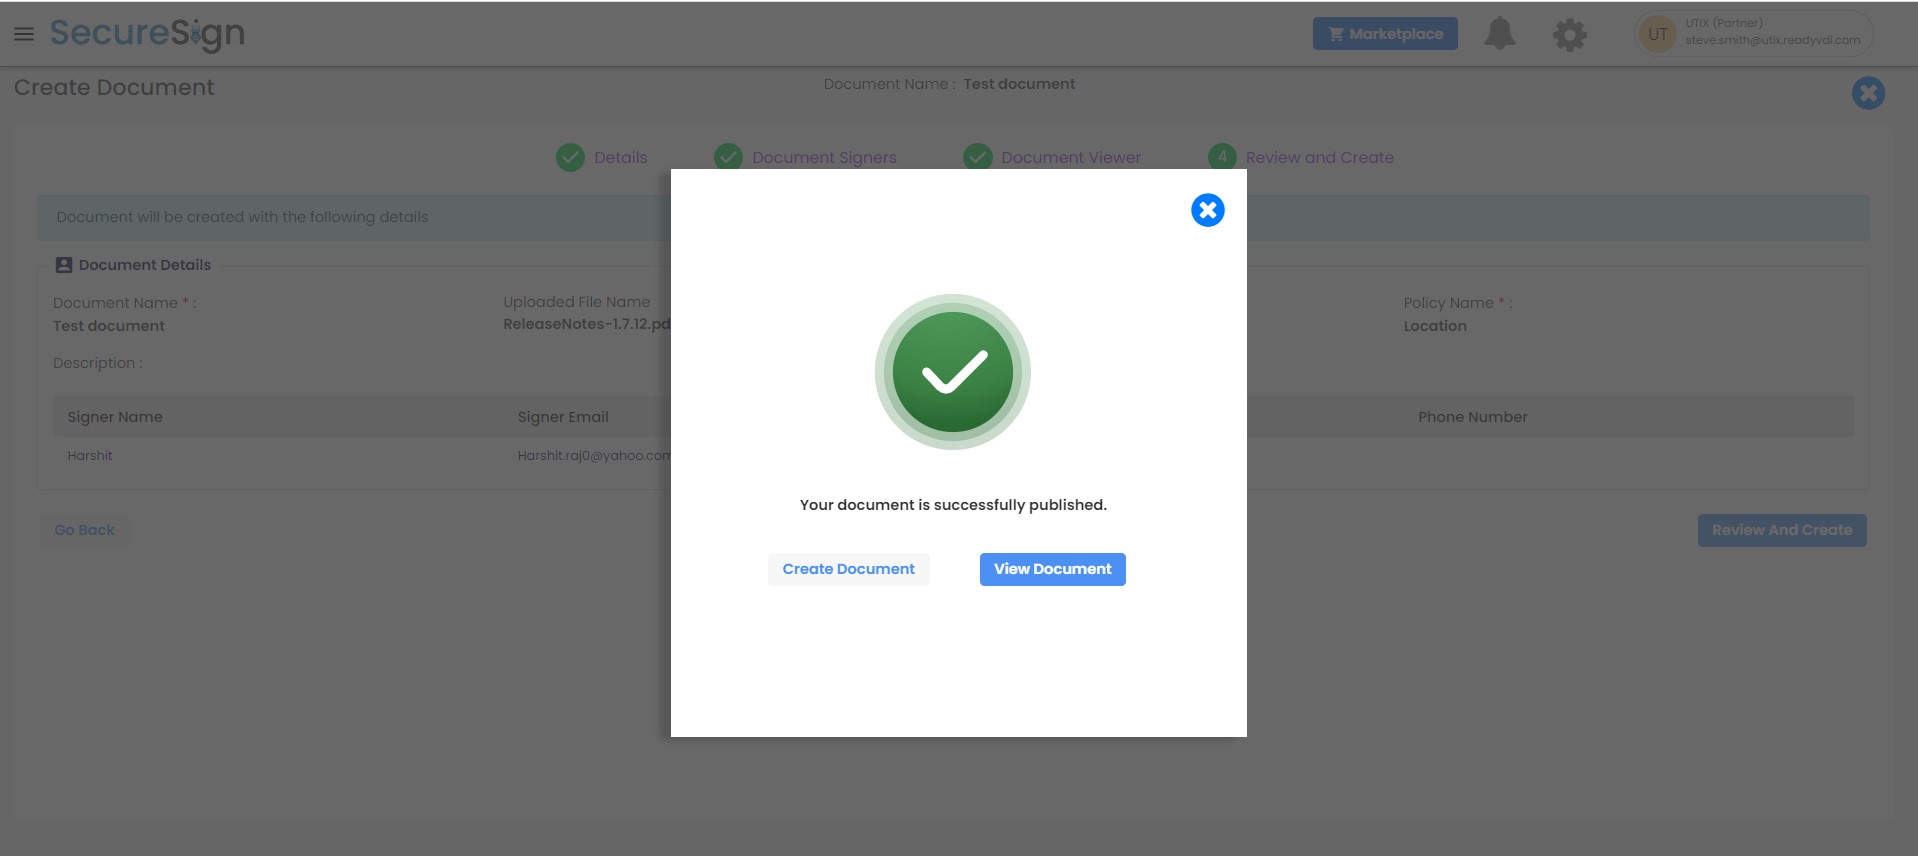
b. On clicking publish now button document will be published.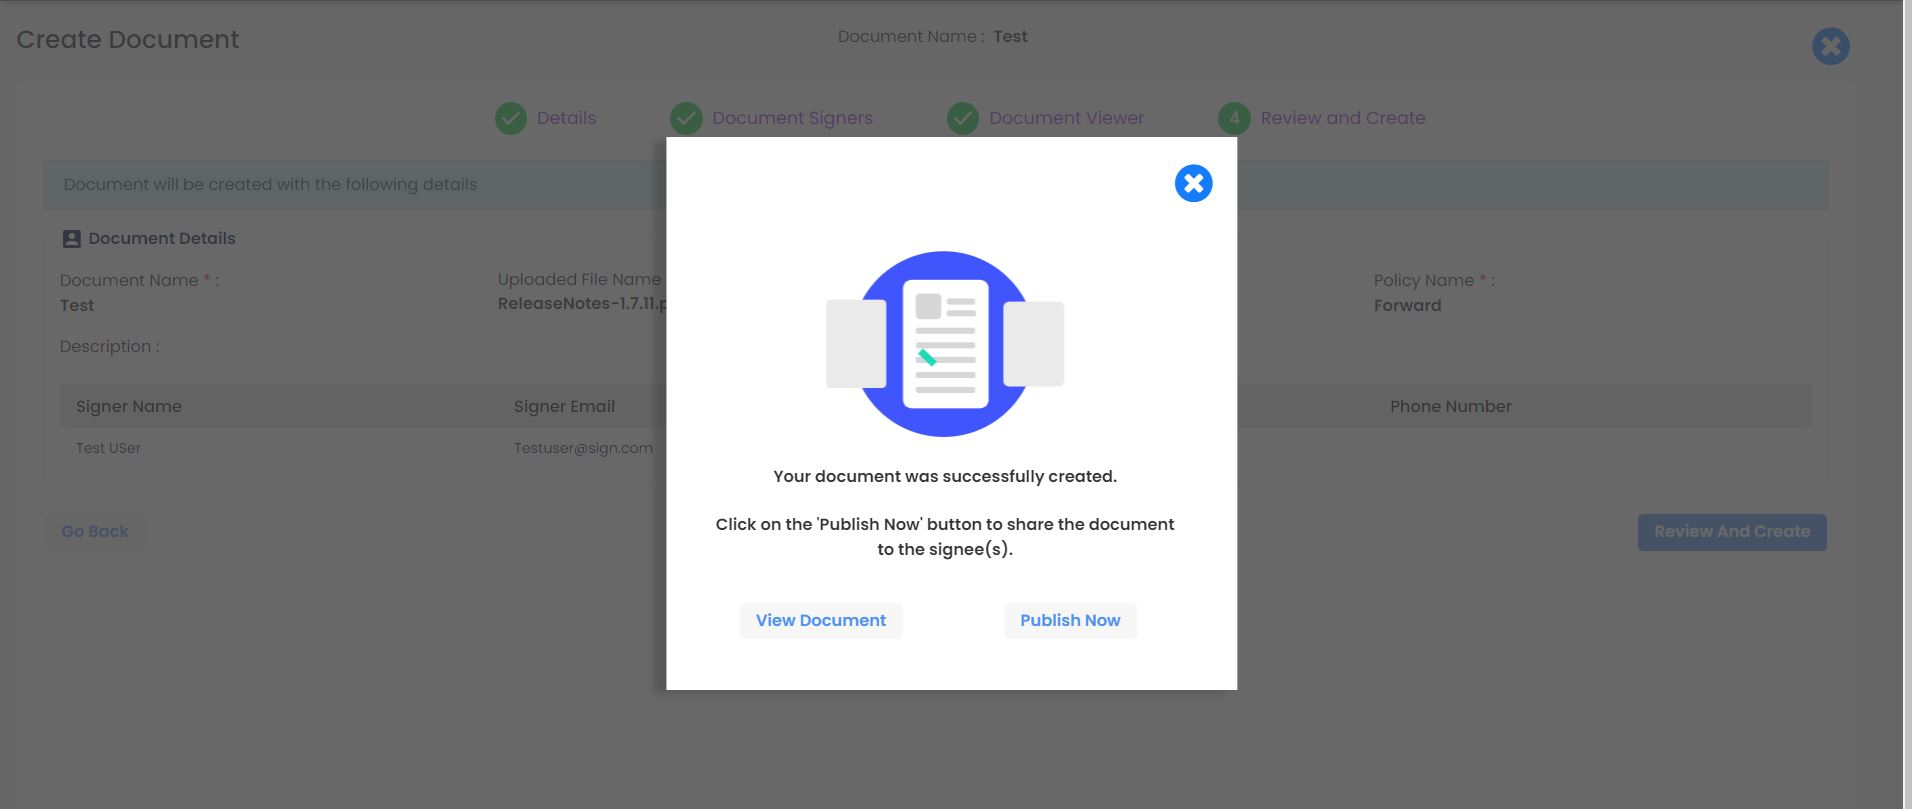
Click on publish now button document will be published.
a. On clicking create document button the page will navigate to create document page and able to create new document.
b. On clicking view document button the page navigate to document overview page.
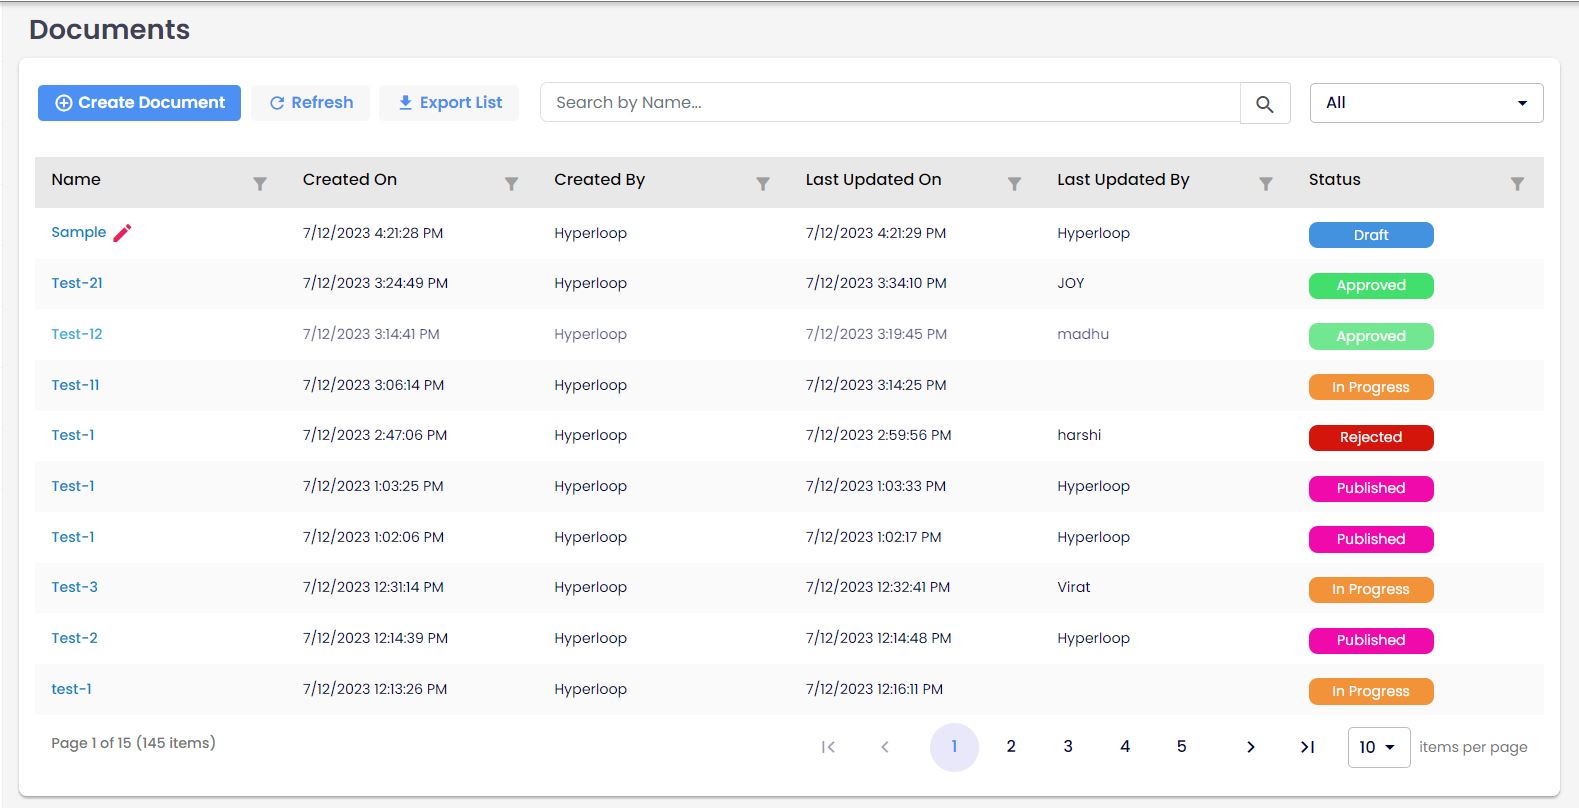
After publishing the document.the created document will be listed in the document grid page with the status as published.
Once document is published.the signers will receive an email for signing the document which contains link to the portal.
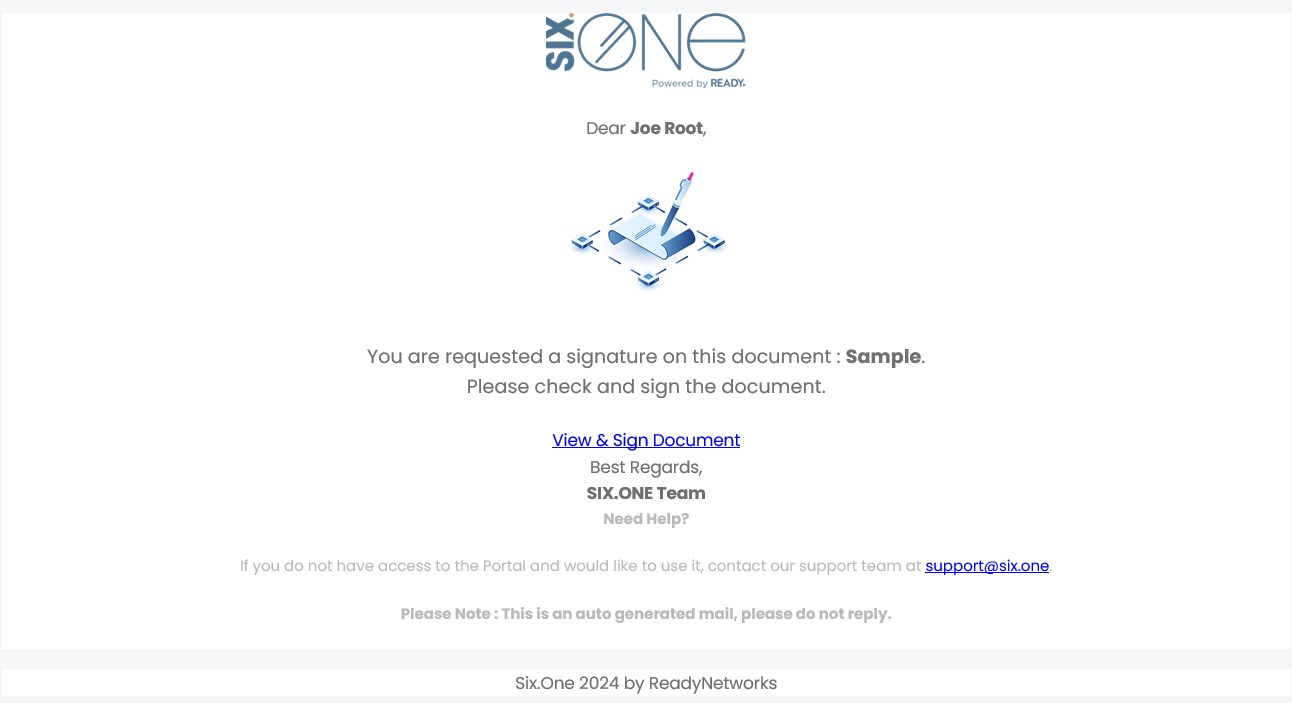
Signer need to click on the link "View & Sign Document" and signer is now navigated to Signers portal login page.
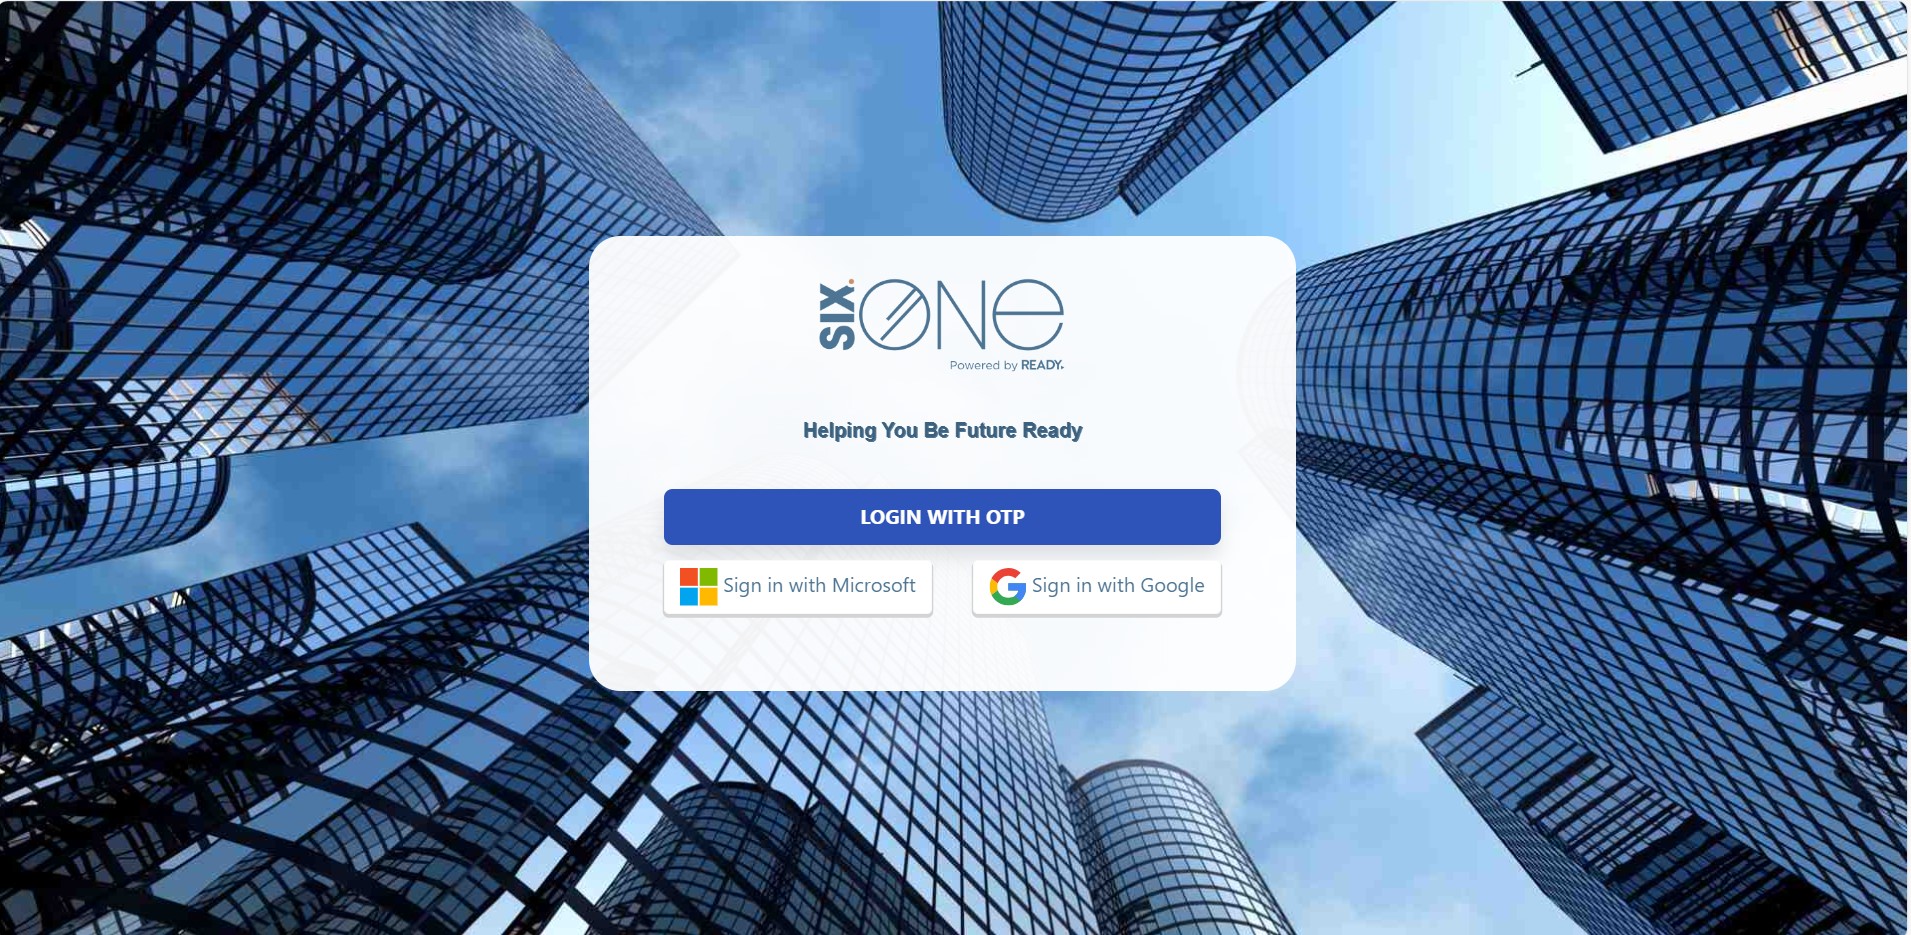
Based on Authentication method selected when creating the document Signer can login either using sign in with Microsoft or sign in with Google or Login with OTP button.
i. Sign in with Microsoft or Sign in with Google- If Signer is already SIX.ONE user then he can access the document for signing using his SIX.ONE login credentials it can be either Microsoft or Google.
ii. If Signer is an external, he can access the file using OTP which he will receive on his email on clicking on Login with OTP button.
 Signer will receive a mail regarding OTP by entering the OTP signer can able to log into the portal.
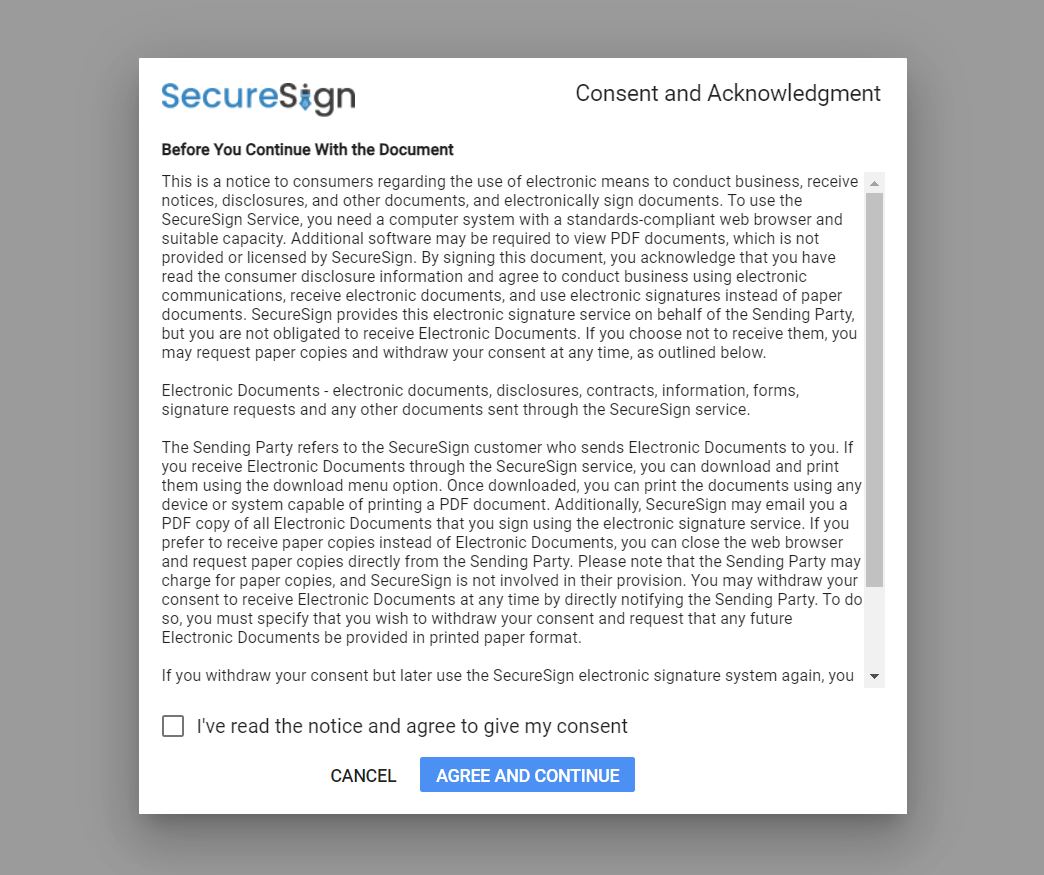
User should accept the Consent file to proceed with signing the document which is a mandatory field. Without expecting the Consent file signer is not able to view or proceed the document for furthur.
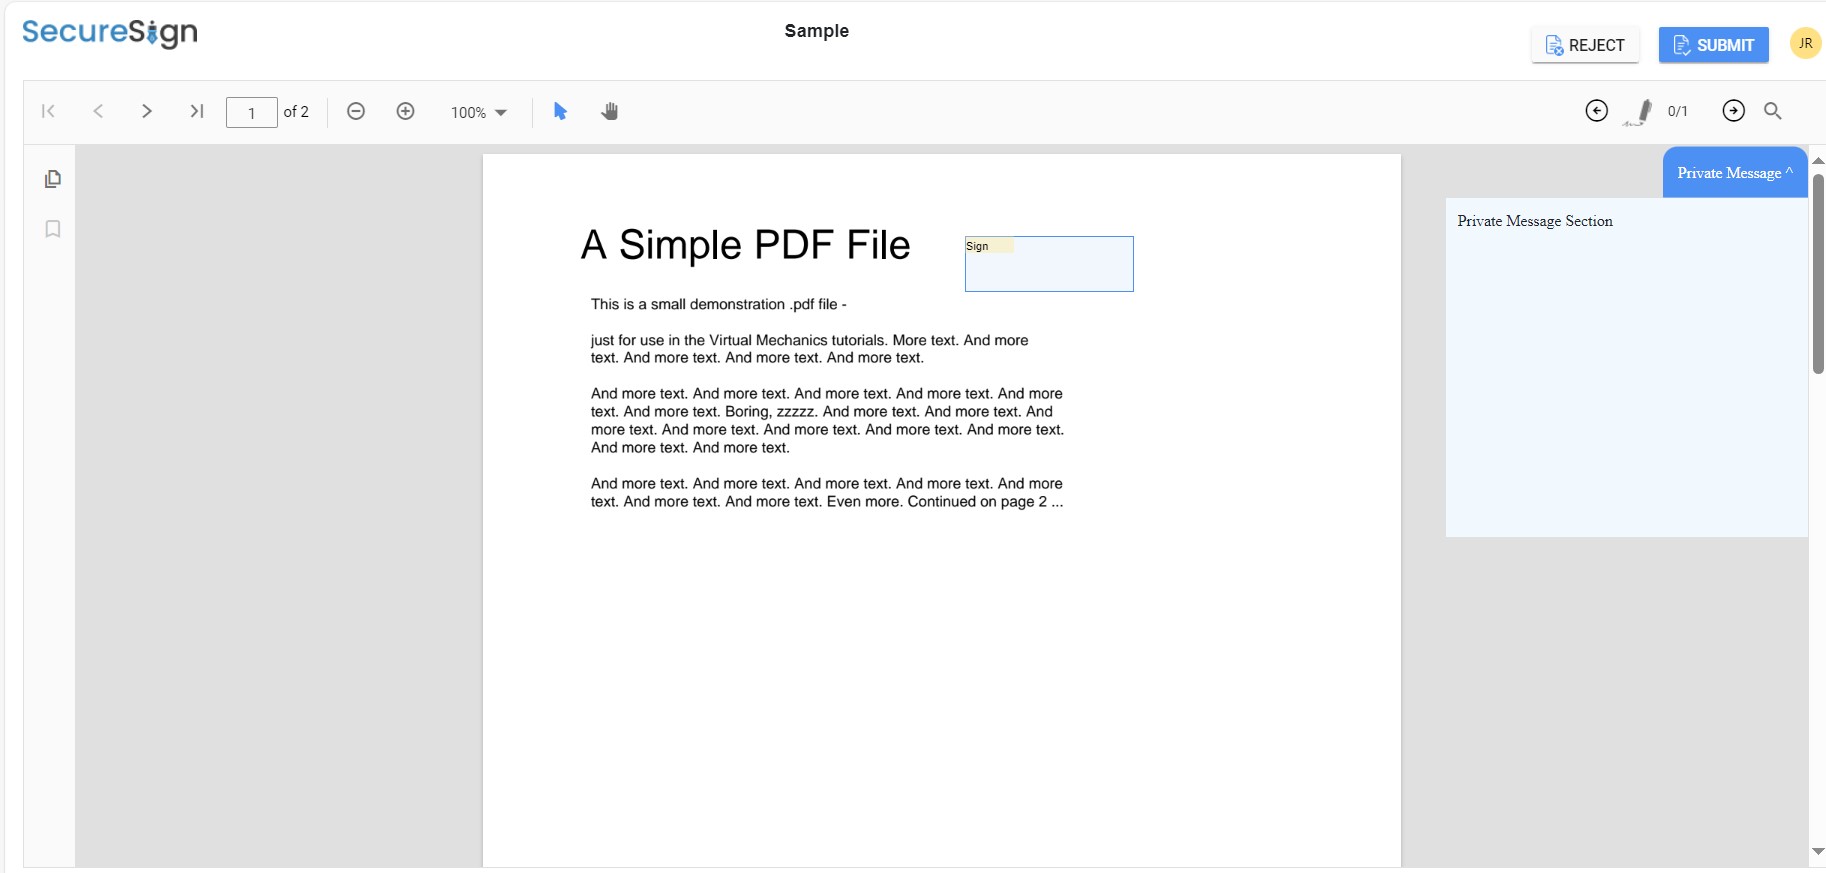
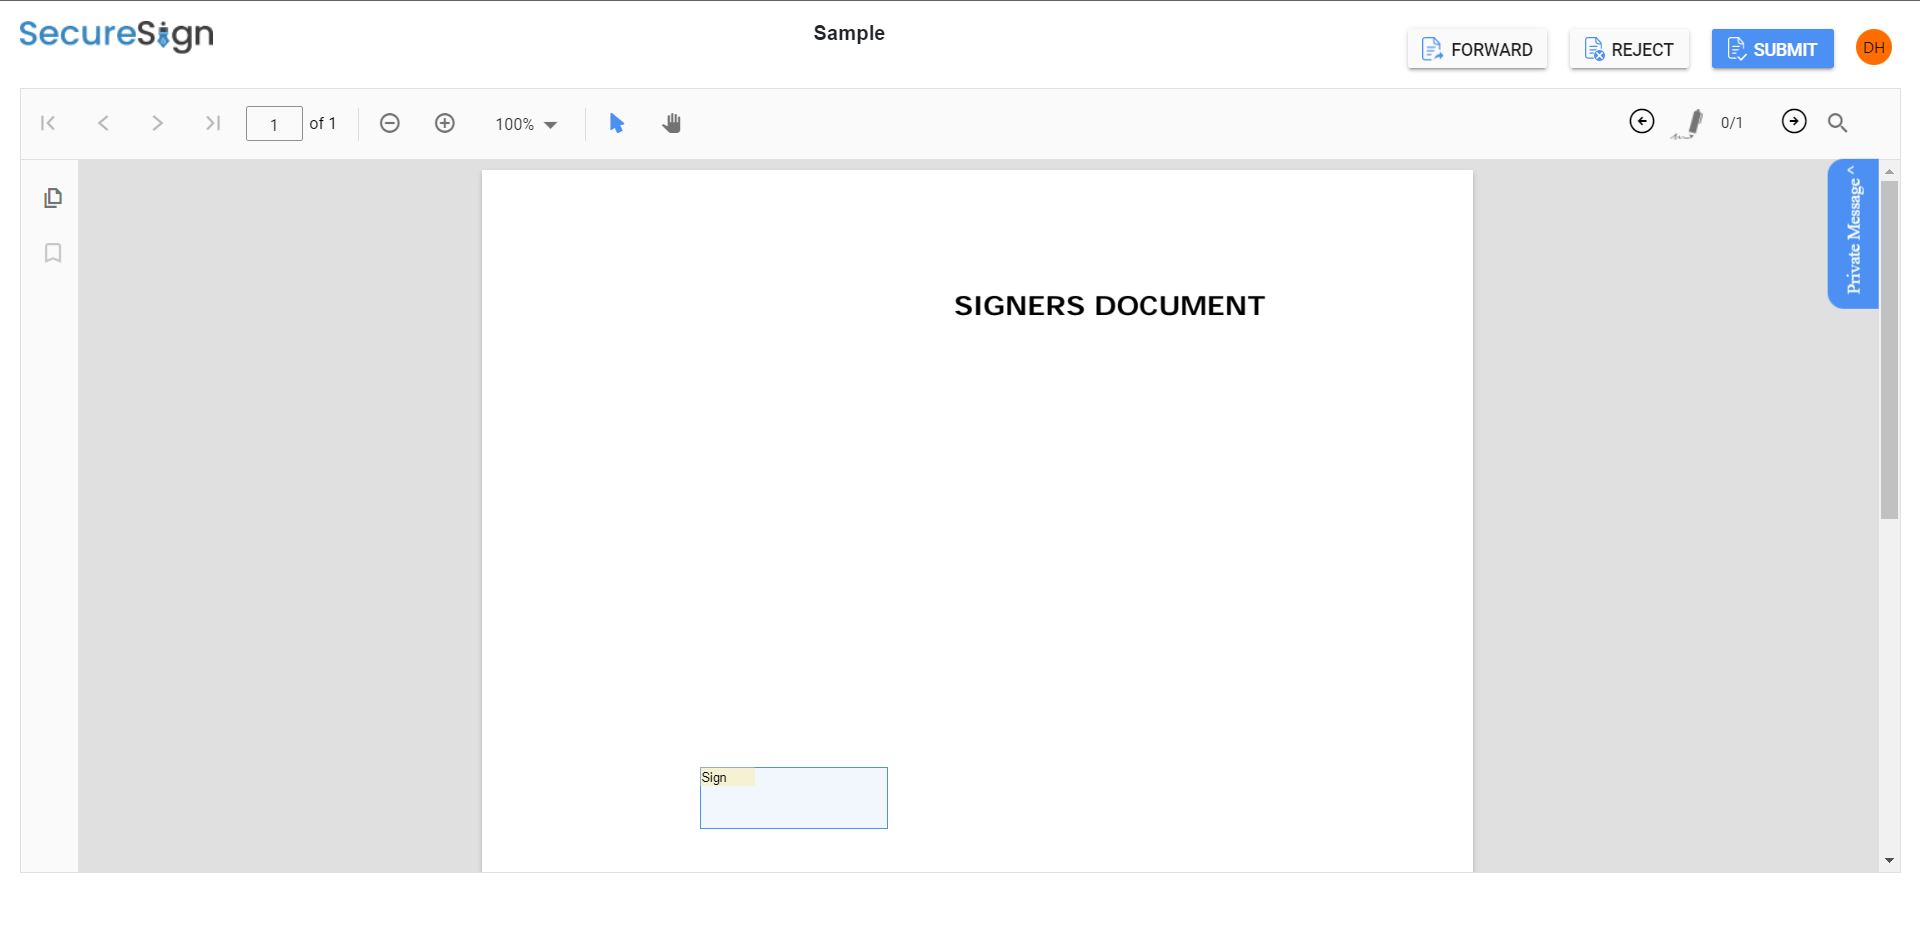
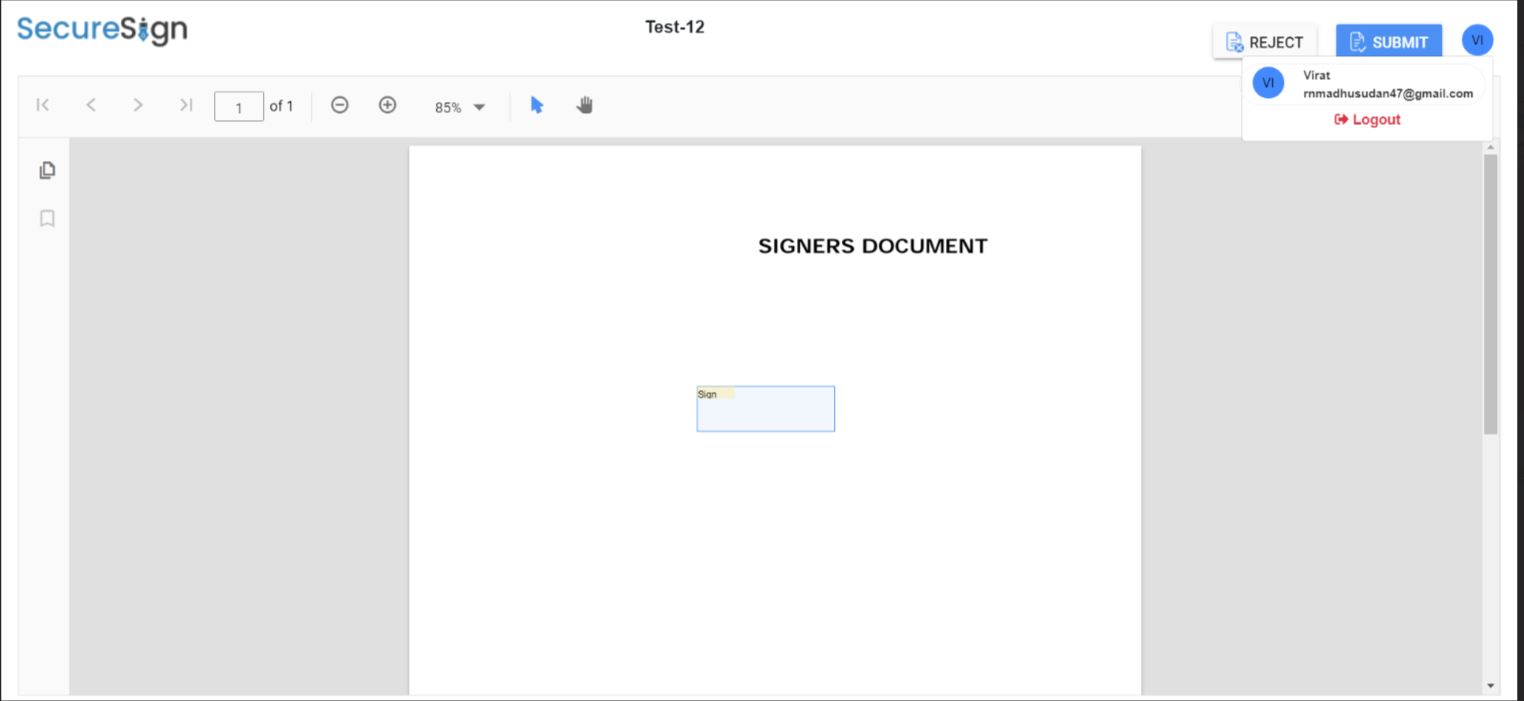
On Successful login file gets displayed with Signature fields with Submit and Reject button, if "Forward policy" is applied then "Forward" button will be displayed.(Click here to know more about Forward Policy)
Click on the Signature box which opens a Signature dialog and user can add his Signature in the Signature box using any of the below Signing options.
i. Draw - User can manually draw in the space provided to add his Signature
ii. Text - User can Type in his Name to add it as Signature.
iii.Image - User can Upload his Signature Image as well to sign the document.
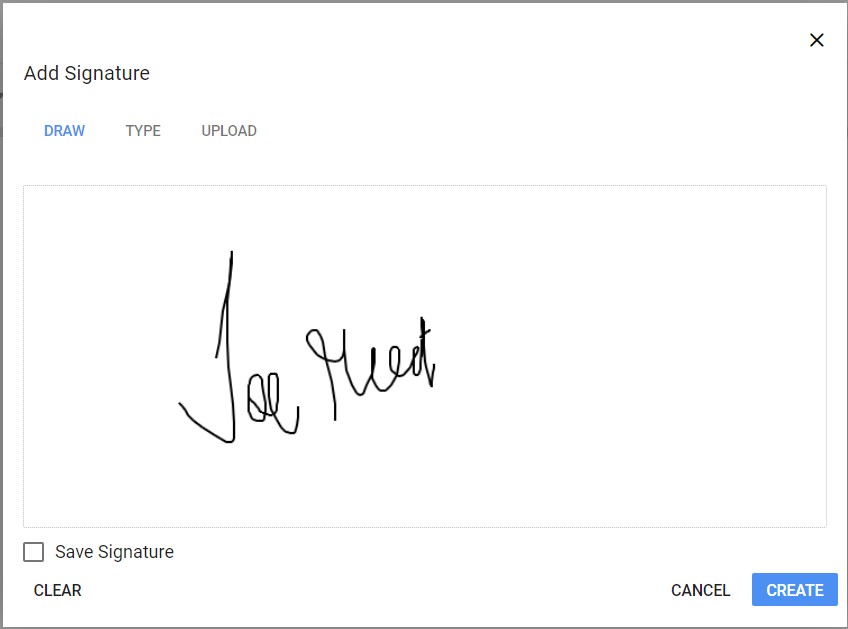
Signer can save the signature can use same signature for other signing fields in that document.
On top right side signing text field count is provided. if signing count do not match with the number of count and try to submit the document will get error message please fill all the required fields.
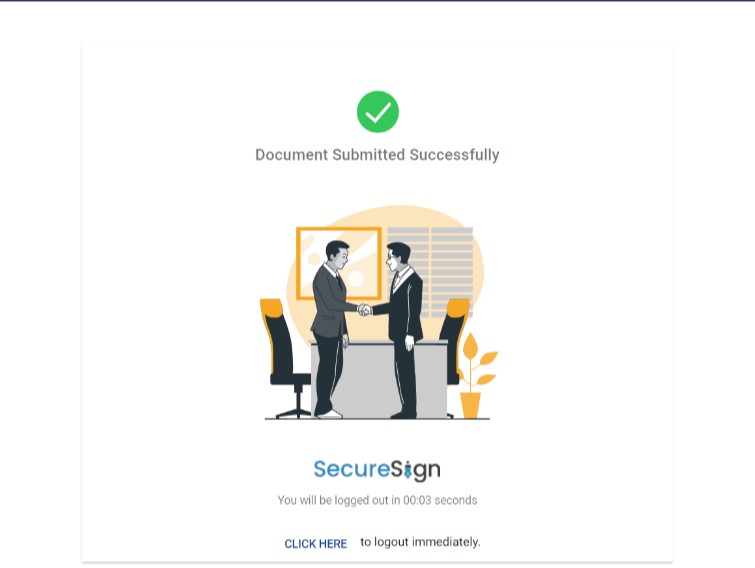
Once Signer has Signed he can click on "Submit" button to submit the document.
If signer need to reject document click on "Reject" button and he need to provide valid reason for rejection
Note
All actions performed by Creator and Signers are updated under logs.
Other Features
Host signature session with in-person signers
Signer can be able to sign the document from the owner's device. Owner should click on "Sign now" button from the signers page for the particular document. It is an other way to login to the signers portal.Also signer can login to the portal using link sent through the mail.

On clicking "Sign Now" button signer can log into the portal in two ways,
i. By clicking on proceed button, the current session of owner portal will get logged out and signers portal will be opened.
ii. Owner can copy the link of signer portal login page can opened in other browser without logging out of the owner portal.

Logout option for signer
The "Signer Logout" option is a feature commonly found in document portals or electronic signature platforms. It allows the signer of a document to securely log out of their session once they have completed the signing process or wish to exit the portal.
Document overview page
a. Document can edited by clicking on edit button. this edit works only on draft status of the document. all the details can be edited expect uploaded document.
b. Document can viewed by clicking on view document button.
c. Document can downloaded by clicking on download button.
d. Document can published by clicking on publish button.
e. Document can Deleted by clicking on delete button. If it sent to wrong signer or the document is incorrect. Then click on delete to delete the document and the document will be deleted from the list. if already published and deleted the document, then the user will get an email to notify that the document is no longer valid and access from the signer to sign the document will be removed.we can not delete the document once it is completed(either submitted/rejected). document can be delete only at draft, publish and in-progress status.

Private message
Private message is normally used to communicate directly with signers involved in the document signing process.
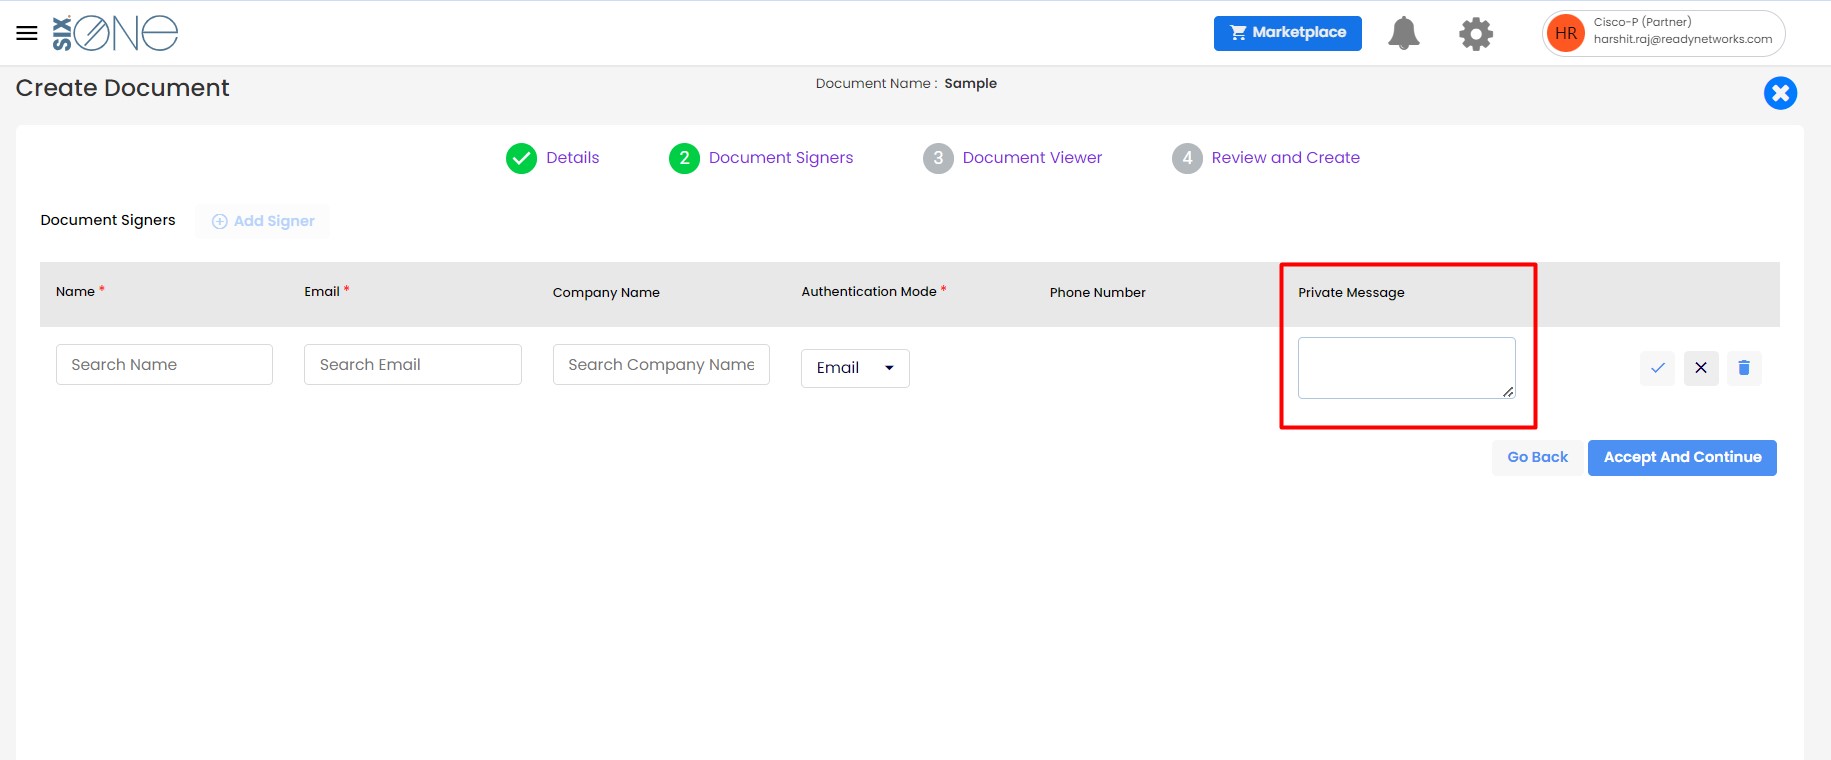 In add signer page document owner can add private message to particular signer that private message will be shown to that particular signer only after logging into the signer portal.
